Category Archives: Uncategorized

The Most Perplexing Amazon Review Ever

It’s funny how things pop up sometimes.  I just stumbled across one of the most perplexing Amazon reviews I’ve ever seen.  It’s not laugh-out-loud hilarious or amazing, but it gives just enough of a hint of a situation that you’re left with nothing but questions.  It’s not like the Three Wolf Moon tee-shirt, where customers actually compete to write the funniest, most outlandish reviews ever.  It seems to be a real review.  Before I share it, a bit about how I came across it.

I have a hearing problem.  I grew up with some degree of hearing loss and then spent years working in a very loud nightclub, which damaged my hearing even more, particularly in the high frequencies.  I normally get by OK, but today my hearing loss was a pain.  I was doing laundry today.  Shirts, specifically, which require that you take them out of the dryer immediately and lay them out or hang them up, or they become wrinkled, after which you would have to “refresh” them by running the dryer for ten more minutes or so to de-wrinkle them (my dryer actually has a “Refresh” setting).  My problem is that I can’t hear the dryer buzzer, so I normally set a kitchen timer to remind me to take out the shirts.  Today, I kept missing the timer because I didn’t hear it.  I tried moving it with me into the other room, but things worked out so that I happened to be out of ear-shot every time the thing went off.  I “refreshed” my shirts four times before I finally remembered to remove them before they got wrinkled.

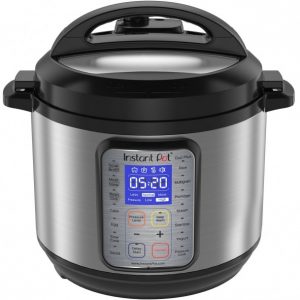
I realized that I needed a loud timer.  I went to Amazon and searched for “loud timer” and came across one made by ThermoWorks, the people who make my favorite instant-read thermometer, the Thermapen, which are the same ones they use on America’s Test Kitchen.  Looking at the reviews for this timer (it has a four star average, which is pretty good), there are four one-star reviews: three people who complain that it just wasn’t loud enough…and then there is my reviewer.  It’s another one star review, and her complaint is that it’s not waterproof (to be fair, it is only described as “water resistant”, not waterproof).  Here’s her review.  I’ll let you take a minute to go read it.

OK.  So the timer isn’t waterproof.  Whatever.  That’s not the good part.  Her son “loses track of time” in the shower?  How old is he?  If he’s around 13 to 18, I can tell you–he’s not losing track of time–he’s just not spending all his time in the shower actually “showering”, if you know what I mean.  He’s got something else going on.  And how long are we talking?  Is he spending 30 minutes in the shower?  45?  How much time does she allot for a shower?  5 minutes?  How does she determine exactly how long is too long?  I mean, I was raised in a poor family and I was never griped at for taking too long in the shower (well, maybe once or twice, but only in passing–my mother would certainly never have set a timer on me).  But beyond the timing issue…did her son really need to take a 90 decibel timer with him into the actual shower stall?  90 decibels is equivalent to a motorcycle or a police whistle.  Could he not have heard it if he left it on the bathroom counter or the back of the toilet?  Where did he put it?  Did he have to hold it in his hand while he was showering?  So many questions.

It may just be me, but I find this review fascinatingly odd.  Buying a kitchen timer and then taking it with you into the shower is the mark of somebody who just doesn’t function on all cylinders.  It’s like this one barista who used to work at Walton’s, Sandra Bullock’s cafe/florist/bakery in downtown Austin.  I bought a cup of coffee from him one day.  It was freshly brewed and piping hot.  There was plenty of room for cream, and I only add a little, so there was still 3/4 of an inch of room at the top.  I took it back and asked if he could give me two or three cubes of ice to cool it down (I don’t like to sip coffee–I just drink it).  He looked at it skeptically and said, “I’ll have to dump some of it out”.  I told him there was no reason, that I just wanted to cool it down a little bit–I still wanted it warm, just not hot (I also knew they have small ice cubes).  He gave me a look like he couldn’t believe I was forcing him to do this, said, “Okay,” and then took his ice scoop, scooped up a massive mound of cubes, and began shaking it about 8 inches over my cup.  Of course, 10 cubes dislodged and tumbled off his mountain of ice and landed in the cup, causing the coffee to splash out on all sides and all over everything nearby.  He threw the remaining ice and scoop back into the icebin and then picked up my coffee (spilling more in the process, since it was now full to the brim)  and gingerly tried to hand the wet cup back to me, dripping all the way.  I looked at him and asked him to set it down on the counter–I had no intention of trying to reenact a Keystone Cops routine with him as he tried to transfer the overflowing, dripping cup to my hand without spilling any on me.

I’ve worked in coffee a long time.  You don’t hand a dripping cup to a customer.  You don’t hand a wet cup to a customer.  In fact, in my view, you never hand a cup to a customer at all–the hand-off is when accidents happen, and people end up spilling coffee on each other and getting burned.  Even with a lid, I’ve seen the lid pop off when the barista or customer misjudged and managed to squeeze the cup between their two hands as they tried to transfer it.  It is much better to put the cup down and allow the customer to pick it up–especially if it has no lid!  If you spill something down the side of a cup, you either double cup by sliding a fresh cup over the spill, or you transfer the drink to a fresh cup and dispose of the old one if it’s too soggy.  And, for goodness sake, if you want to add three ice cubes to an almost-full cup, pick up three ice cubes!  Your scoop works just as well to pick up a few cubes as to pick up a whole scoopful.

It’s funny the direction this post took.  Maybe I should have called it “people who don’t have a clue.”

That boy no longer works at Walton’s.

YA/Young Adult Novel “Daughter of Smoke and Bone” by Laini Taylor: a Review

I just started reading Daughter of Smoke and Bone by Laini Taylor last week, due mainly to the glowing review it received in Entertainment weekly. I have to say, it’s one of the best books I’ve read in a long time. It has enough teen romance (will they or won’t they/does he like me as much as I like him/has he stopped liking me?) to satisfy the legions of Twilight fans, while at the same time being a much better book.

It is the story of Karou, a young art student in Prague who has been raised by some sort of demon-like creatures called Chimaera (chimera: a hybrid of two or more creatures, such as a griffon or sphinx), and her journeys in the real, physical world of Earth and her time spent in the Elseworld where the Chimaera live. Her life is a mystery, even to her, as she doesn’t know where she came from. Her guardian and protector, Brimstone, sends her on errands all around the world to collect teeth, and although she doesn’t understand the reason he needs so many teeth, she knows that he works some sort of magic with them. In fact, she keeps a steady supply of physical “wishes” on her at all time that allow her to do things like wish her hair into a bright blue color, or even—if she could only manage to get hold of a powerful enough wish—to give herself the power of flight.

Things go awry when she happens to run into a beautiful male angel while she is on one of her teeth-gathering expeditions, and she is shocked when the angel attacks her, since she has no idea of the deep history between her friends the Chimaera and the Seraph (angels), who have been at war for centuries. Luckily, Brimstone has had her educated in many forms of offensive and defensive hand-to-hand combat, so she survives the attack, but she finds herself haunted by the questions of who the devastatingly handsome angel was, and why he attacked her on sight…and also why he stopped at the last minute, just when he was poised to kill her.

The mythos of the worlds created by Laini Taylor far surpasses the level of writing that is popular in most young adult books these days, and I would say that this book, while perhaps not thematically the best fit for adult audiences, is at least well enough written and realized that it should appeal to both adults and teens. Personally, I’m loving it. I’m currently about 80% of the way through the book, but it’s one of the rare books that I wish wouldn’t end. I’m already hoping for a sequel!

The Problem with The A-List: Dallas

I tried to watch the first episode of The A-List: Dallas, LOGO TV’s new “Housewives with Balls” series, but my boyfriend fell asleep halfway through. I have to say, I don’t blame him. The first 30 minutes was incredibly boring and repetitive. But the show has a much bigger problem than being boring: they don’t have a star, by which I mean they don’t have a single attractive person in the cast.

Being a “star” has one main requirement in my mind: you have to be nice to look at. Or at least easy to look at. These guys are passable, but none of them is any more attractive than 20 other guys I would see if I went to any gay bar in Austin, even on a slow night. The show apparently lost its most handsome cast member sometime between the show’s announcement and the debut of episode one, so it seems that they scrambled to cast somebody else as the “Reichen” (Lemkuhl) of the group. And that would be Levi Crocker. The guy seems like a genuinely nice guy with bad taste in clothing and a loose grasp of the principles of marketing (check out his Inchwear website for a laugh—it’s nothing but clothes that say “hang left” or “10 inches”—and the website is laughably primitive to boot). Sadly, while Levi Crocker is probably the most handsome of the remaining cast members, he is about ten years away from becoming Jamie Farr.

Levi Crocker MugshotJamie Farr from M*A*S*H

The rest of the cast? Well, I can honestly say that the one that I was determined to hate, the gay Christian Republican (I can’t remember his name), was the most appealing of the bunch. Don’t get me wrong…I still hate him. I just hate him less than the rest of these tw*ts. James, the drunken drama queen with an overgrowth of gum tissue, is a vacuous non-entity. The woman barely registers (and whose friend is she supposed to be anyway?) The black guy seemed harmless enough at the beginning, even going so far as to tell Levi that he wasn’t going to talk behind somebody’s back, only to then turn around and talk about Levi as soon as he stepped out of the room to use the restroom. And did I leave somebody out? Oh, yeah, the hair guy. He is an oddball. He looks like he just crawled out of bed in his wrinkly wife beater shirt, but he’s supposed to be rich or something? This was the one who was added at the last minute, after the attractive guy didn’t work out. And it’s clear that the rest of the cast barely knows who he is.

When I say that a star needs to be attractive, I’m talking about in that “movie star” way. I’m fully aware that a person can be a good (or even great) actor without being attractive. I mean look at John Turturro or Paul Giamatti or John C. Reilly. All of them horribly ugly dudes, but they are usually quite good actors (although John Turturro’s performance in Transformers almost cancelled out every bit of good will he’d built up over the years). These guys are not easy to look at, but they have *something* that sets them apart and makes them interesting. The cast of The A-List: Dallas? They are unattractive on top of being annoying. The A-List: New York is full of attractive people (by which I mean, of course, that they are people you’d want to sleep with). Reichen, Mike Ruiz, Rodiney Santiago, and Austin Armacost are all handsome men. I’ve been to Dallas and I KNOW that Dallas has many attractive men, so I am truly baffled how the producers of this show could go to Dallas and come up with THIS cast. Was it cast by straight men? Were they trying to make Texans look bad by choosing revolting characters?

OK, to be fair, I got it wrong earlier; when I looked it up again, I realized the hair guy was not the last-minute addition. That was the gay Republican. In case you’re interested, here’s the cast:
The Cowboy Hat: Levi Crocker; he thinks he’s not a stereotype.
The Black Guy: Phillip Willis; embraces the stereotype.
The Hair: Chase Hutchinson; he actually seems like the most interesting person, probably because he seems the least “A-List” of all of them.
The Woman: Ashley Kelly; sweet girl who doesn’t understand why she’s here.
The Drunk: James Doyle; will not age well; in fact…is not aging well.
The Republican: Taylor Garrett; seems like fun despite his delusions.
The One that Got Away: Beau Bumpas; announced in the original cast, he apparently realized this train was a wreck and bailed; replaced by Taylor.

Please, share your comments below!

Apple’s iOS 5 Update Has Broken the Stanza Ereader App; Amazon Apparently Intends to Kill It

My favorite and most-used app, the Stanza Ereader, was broken by Apple’s latest update, the iOS 5 operating system. I can’t tell you how much this disappoints me. By reading online message boards, it’s clear that thousands of other people are just as upset as I am.

Amazon bought the Stanza application from its developer several years ago and stopped updating the app. I suppose Amazon might argue that they wanted the code or the technology or a patent or something, but it feels an awful lot like they just purchased a popular competitor (to their proprietary Kindle App) to put it out of business. To understand the significance of this, you need to understand that Amazon’s Kindle only allows you to read books that are in Amazon’s own, proprietary format. Most ebooks come in ePub format, but you can’t read an ePub book on Kindle. Stanza was the most elegant ereading app out there. It allowed for one-touch brightness adjustment while you were reading, by simply swiping your finger up or down the screen. It also offered easy font size adjustment and many other customization options.

The Kindle app is simply not an acceptable replacement for Stanza. I have tested dozens of free ereader apps over the last two days, and the only ones that come close to Stanza’s functionality are the Kobo e-reader and Bluefire Reader. Both of these apps offer landscape locking, night mode (white text on a black background so you can read in bed without producing a lot of ambient light, so you don’t disturb anybody else who is in bed with you), a progress bar, font and margin adjustments, and many other nice features. I slightly prefer the Bluefire Reader, although it has an odd and complicated way of managing bookmarks—I prefer the simple, one-touch tap in the upper right corner, but Bluefire Reader makes you go through several steps to create a bookmark, and even then, it does not provide a visual clue on the page to identify the page as having been bookmarked.

Really, what I hope happens is that enough people get upset with the death of Stanza that Amazon decides to respond, and update the app so that its legions of fans can continue using it. I used it every single day, and, although I am normally a big fan of Amazon, at the moment I’m holding a grudge against them. You can bet they made sure the Kindle App was ready for iOS 5! If you want to tweet to @Amazon and ask them to fix the @stanza_reader, please feel free to do so! In fact, here’s an easy way to do it: copy the following text, then hit the Tweet button at the top of this article, paste it in, and send!

Please @Amazon do the right thing and fix the @stanza_reader ! #Stanza #AmazonKilledStanza #RIP

Inspiration Is Where You Find It…I Find it in Dolly Parton!

I went to see Dolly Parton at the Cedar Park Center last night, and I was totally amazed at how great she sounded. She sounded as good as she did in the 70’s, and that’s amazing for a 65 year old woman. To compare, I saw Liza Minnelli a few months ago, and her voice was definitely a shadow of what it used to be.

I saw Dolly Parton the first time when I was around 7 years old, around 1972 or 73. She has always been one of my favorites. I think she’s warm and funny, but she is also a true artist and a great songwriter. She sang a new song that she wrote for her latest album, Better Day, and although it wasn’t my favorite song of hers, some of the lyrics of this song inspired me.

She introduced the song by saying that she wanted to thank everybody in the audience for supporting her over the years, and allowing her to have such a long and amazing career. When she was just a little girl living in the Smoky Mountains, in a house with no electricity and no running water (‘unless you run down and got some’), she used to put a tin can on a tobacco stick and pretend it was a microphone, and she dreamed of being a famous singer. She went on to say that she had to work at her dreams. “You can’t just dream your dreams, you have to work ‘em, you have to put wings on ‘em and keep working them until they come true.” She then went on to sing this song, called ‘The Sacrifice.’ The song has a message of working and making sacrifices to make your dreams come true, and not giving up if you suffer a setback. Some of the specific lines that inspired me were:

“I was gonna be rich no matter how much it cost, and I was gonna win no matter how much I lost”

and:

“I’ve often laughed and I’ve often cried, I’ve often failed but I’ve always tried”

and my favorite line of the song:

“You don’t drink the water if you don’t dig the well.”

To me, the message is not quitting when something doesn’t work out; keep trying until you do succeed.

Anyway, I was so touched and inspired by her that I wanted to share. She’s obviously an incredibly hard-working woman, and she says that she feels like she’s just getting started. I hope to see her still going strong in another twenty years. She hopes so too, as illustrated by my favorite one-liner of the night: “People ask me, ‘Dolly, what do you want people to say about you one hundred years from now?’ I want them to say, ‘WOW! She really looks good for her age!’”

Jalapeno & Cilantro Primal Pesto with Chicken and Spaghetti Squash (Also Great with Pasta)!

If you are like me and you share meals with somebody who isn’t totally following the Primal method or Paleo diet, this Primal pesto recipe is great, because it is so easy to divide the sauce, and the recipe is also low carb diet friendly, as well as wheat free and gluten free, and it can easily be made dairy free by simply omitting the parmesan—there is so much flavor from the cilantro and jalapeno that you probably won’t even miss it. You can have your portion over spaghetti squash, while the other people in the house can have theirs over pasta, if they wish. It is also a great way to use up any leftover chicken. And there is nothing sacrificed in this dish—it’s pretty much exactly the same recipe I used before I decided to go primal. I came up with this recipe after trying the Jalapeno Pecan Pesto with Cilantro that is sold in the olive bar at my local Whole Foods. It was delicious! With just a few trials, I managed to come up with a recipe that I think is even better! It’s also better than any recipe I’ve found in any cookbook.

Jalapeno Cilantro Primal Pesto

Jalapeno Cilantro Primal Pesto in Food Processor

One of the reasons I actually prefer this dish to “normal” pesto (made with pine nuts and basil) is that it is so much cheaper. Even the Italians don’t always use pine nuts (or pignoli) because they are so expensive. It is common to substitute almonds or walnuts, and both will work wonderfully with this dish. I choose to use walnuts because I can buy a huge bag of high quality walnuts at Costco, and because walnuts are high in omega-3 fatty acids and ellagic acid (and they taste great). Walnuts are actually the only nuts that contain omega 3s in any substantial amount, although there are trace amounts in nuts like cashews and brazil nuts. You can give your meal an even bigger boost of omega 3s by opting to mix the pesto with walnut oil instead of olive oil. The fact that this oil is consumed raw only adds to its health benefits.

spaghetti squash cooked

Squash should be easily pierced with a fork when done

One note before we begin: the leftovers from this recipe do not keep as well as most. The raw freshness of the cilantro and peppers is changed when the dish is reheated, unless it is heated very slowly and carefully (heating it too hot will cook the pesto, and will make it taste completely different, and not as fresh). This will make enough for 4 people. If you are making the dish for one, it would probably be best to halve the recipe so that you don’t have a lot of leftovers; it is so simple to throw together another batch of the pesto that I’d just wrap the second half of the spaghetti squash in plastic and keep it in the refrigerator, and whip up another batch of jalapeno pesto a few days later. The following directions do not include cooking the pasta, so, if you intend to do so, just be sure you time it so that the pasta will be done by the time your spaghetti squash is done

Primal Recipe for Jalapeno Cilantro Pesto with Spaghetti Squash and Chicken

1 medium spaghetti squash

2 large chicken breasts or 4 boneless, skinless chicken thighs

2 bunches of cilantro

2 or 3 jalapenos (to taste); other peppers like serranos can be substituted for a change of pace

5 or 6 garlic cloves

1 tablespoon table salt

¼ cup of olive oil or walnut oil

¾ cup of raw walnuts

Lime juice to taste (1/2 to 1 lime)

½ cup ground parmesan cheese (optional, will taste fine without, but may need additional salt)

Directions:

To begin, cut the spaghetti squash in half lengthwise (from the stem through to the opposite end). Be very careful when doing this, because this is a very hard type of squash, and it requires a lot of force to cut through. If you aren’t careful, it is very easy to slip and injure yourself. I find it easiest to cut this type of squash by using a large chef’s knife such as the Forschner Fibrox 8 Inch Chef’s Knife (the most useful knife in my kitchen—if you don’t have a large chef’s knife, you owe it to yourself to get one; they’re only about $25 at Amazon). Start by securing the squash by laying it on a folded towel on your countertop or cutting board. Then, pierce the side of the squash by driving the tip of the knife straight down into the flesh until it is embedded. Carefully but firmly force the knife to cut slowly through the squash, turning the squash as necessary to make sure that you are always cutting downward toward the cutting board. Once it is cut in half, scoop out the seeds and membranes and discard.

spaghetti squash being shredded

Use a fork to "shred" the squash, which should come apart easily

Add about ½ cup of water to a microwave-proof pie plate such as a Pyrex plate (if you don’t have one, a bowl will also work). Place one half of the squash cut side down into the plate. The cut edge should be in the water or just above it. Cover the plate and squash with plastic wrap and place in the microwave and cook on HIGH for 12 or 13 minutes.

While the squash is cooking, you can get started on the chicken. If you have leftover chicken, simply cut or tear it into bite-size pieces. If you are starting with fresh chicken, you have a choice to make. You can cook it however you prefer. I used to use a George Foreman grill, and then let it rest for a few minutes and chop it up, but I no longer have that type of grill, so now I cut the raw chicken into bite size pieces and give it a quick sauté. I will leave this step up to you…cook your chicken however you prefer, but make sure that it is thoroughly cooked. Set it aside to rest while you assemble the pesto.

spaghetti squash in bowl

Squash in the serving bowl--no need to oil or moisten, because it's not starchy

To put together the actual pesto, simply put the rest of your ingredients in your food processor with the blade attachment. Add the two bunches of cilantro, stems and all (you may wish to pick off any dead leaves and cut a short length from the bottom of the stems, but the stems are full of flavor, so retain as much as possible). Press the garlic through a garlic press and into the bowl with the cilantro (or simply toss in the cloves if you prefer a chunkier texture). Stem and seed the peppers (discarding the seeds and membranes) and add the peppers. Add all of the remaining ingredients to the bowl. Place the lid on the food processor and turn it on. You can choose to run it for only twenty seconds or so if you prefer a chunkier texture, but I prefer to run it for at least a full minute to make a very smooth pesto. If the cilantro is not mixing properly, you can stop and scrape down the bowl and go again. You can also add a bit more oil if it seems to need more liquid in order to blend properly.

Primal pesto being tossed together

Primal chicken pesto in the serving bowl, ready to be tossed together

When the spaghetti squash is done, (it should be easy to pierce the top side with a fork or knife; the skin is a bit leathery, but the flesh inside should be easy to pierce), slide that side out of the pie plate onto a dinner plate and set aside to cool for a bit. Add more water to the dish and cook the second half of the spaghetti squash as before (wrapped in plastic, microwaved on high for 12 or 13 minutes). After the first half has cooled for about 5 minutes, you can begin assembling the final dish. Turn the squash so the inside is facing up (using a hot pad if necessary) and use a fork to “shred” the squash apart into “noodles”. If you‘ve never done this before, it’s quite simple…just stick the tines of the fork a short depth into the flesh of the squash and pull toward the bottom of the squash. The strands will start to come apart quite easily and you will quickly have a mass of spaghetti strands in the shell of the squash. Dump these strands into a medium bowl that you will use to serve your Primal Pesto. Continue to shred the squash until all of the flesh has been shredded. In the end, you should have a very thin, tough shell, with only a few pieces of squash still stuck to the inside. You can discard the shell at this point.

If you are going to separate the pesto into two batches so that some of it can be used for a non-paleo or non-primal eater, set aside an appropriate portion of the pesto. Add the rest of the pesto to the spaghetti squash in the bowl. Divide the chicken similarly (setting aside some to go with the other portion of the pesto), and add the remaining chicken to the bowl. When the other half of the spaghetti squash has finished, shred it as before and add it to the bowl (you may let it cool for a few minutes if you wish in order to make it easier to handle). Stir, taste, adjust the seasoning, and serve!

Jalapeno Cilantro Primal Pesto on a Plate

Jalapeno Cilantro Primal Pesto on a Plate

Just a few notes about the development of this paleo pesto sauce recipe: I wanted to see if I could boost the omega 3 essential fatty acids even more, so I decided to try substituting flax seed for the walnuts. Let me tell you, it was a mess! Flax seed can be ground into a meal, but if you try to grind them with a food processor, they suddenly release their oil–which is quite thick–and the whole thing turns into a giant ball of gum! I ended up with chunks of gummy pesto instead of a pesto sauce!  One tablespoon of salt may sound like a lot, but you have to keep in mind that this is a sauce, and the salt has to season the chicken and the “spaghetti” as well, so it really isn’t that much.  If you choose to leave out the parmesan, you may want to add even more salt.  During the time while you are waiting for the second half of the squash to cook, you don’t need to do anything special to the spaghetti squash (such as oiling it) to keep it from sticking together, as you would need to do with pasta; pasta is starchy and therefore tends to clump together, while this vegetable is low in starch (low starch=low carbs).

I have plans for more primal chicken and paleo chicken recipes, so stay tuned! I worked on my Primal Jambalaya Recipe last week and this week, and it needs only a few more tweaks before it’s ready.

Fast (Just Over 30 Minute) Primal Chicken Curry in a Skillet with Cauliflower and Sweet Potato

This is one of my favorite recipes, and it is a snap to make. Most of the cooking time is unattended, so I can easily browse the internet or do something else while the meal is cooking. It does have a fair bit of prep (chopping), but after that, it pretty much cooks itself with just an occasional stir.

Some Primal or Paleo dieters may not eat sweet potatoes, but I love them. They are nutrition powerhouses, and they lend this dish a subtle (and VERY pleasant) sweetness. However, this recipe is so easily adapted that you could double the amount of cauliflower and leave the sweet potatoes out altogether, or you could substitute an equal amount of many different vegetables, including turnips or butternut squash, or you could even try something like carrots or cabbage if you wanted. You can also make the dish hotter by using hot curry or more curry powder. Once you have the basic technique down, you will see how easy it is to modify this dish. For more notes on possible modifications and suggestions, keep reading after the recipe.

Primal/Paleo Skillet Chicken Curry

2 large chicken breasts (breast halves), sliced into bite-size medallions
2 tablespoons oil (vegetable or coconut), divided
1 large onion, diced
3 or 4 teaspoons Curry Powder (I use ½ hot and ½ sweet curry)
2 teaspoons table salt
8 cloves of garlic, crushed
1 ½ tablespoons fresh ginger, grated or chopped very fine
¾ cup chicken broth (optional—can be replaced by an equal amount of water)
½ head of cauliflower, chopped coarsely into bite-size pieces
3 or 4 medium sweet potatoes, about 1 ½ pounds, cut into bite size pieces
1 cup frozen green peas, thawed
1 small container (8 oz) whole milk yogurt (optional)
½ cup chopped cilantro

Chicken Breast Strips

To begin, slice your chicken breasts into strips about ¾ inch wide, and then slice each strip into small bite-size medallions. The size and shape are not important, since they will end up tossed into the final dish, so as long as they are small enough to fit onto a fork (and into a mouth!), all will be fine. I would also go ahead and chop the cauliflower into cubes about ¾ inch per side, but again, you are not looking for an exact dice, so a coarse chop is fine. Set the cauliflower aside. If you are fast at grating ginger and chopping garlic, you can wait and do that while the onions are cooking in step two in order to save time, but if you might be a bit slower at this task, go ahead and prepare those two things now and set them aside.

Add 1 tablespoon of the oil to a 12 inch nonstick skillet for which you have a tight fitting lid and put it on the burner over medium-high heat and let it heat up for a few minutes. When it is hot, add the chicken all at once. You will want to stir the chicken every few minutes and continue cooking it until it is done (no pink at all), but we are not looking to brown the chicken here—just cook it through. Meanwhile, while the chicken is cooking, you can quickly chop the onion and measure out the curry and salt (the curry & salt will be added at the same time, so they can be portioned into the same small bowl).

When the chicken is done, dump the contents of the skillet onto a plate and set aside (the chicken will be added back at the end). Add the additional one tablespoon of oil to the skillet and add the onions immediately, since the skillet should still be hot from cooking the chicken. Add the curry powder and salt and stir to combine. The onions should cook for about 5 or 8 minutes over medium-high heat (you can adjust the flame up or down as needed), stirring occasionally. While the onions are cooking, go ahead and grate your ginger and chop the garlic if you haven’t done so already. Also measure out your liquid (chicken broth or water). I recommend that you also peel the sweet potatoes and chop them at the last minute to avoid any discoloration.  The onions will be done when they are completely wilted and translucent, and the curry has started to become sticky, so that the onions begin clumping together. Quickly stir in the ginger and garlic and sauté for about 1 minute. Don’t cook too long at this point or the garlic will become bitter.

Add the chicken broth (or water—but this is Primal CHICKEN Curry, so go with the broth if you can) and stir to loosen any curry that has become stuck around the edges of the pan. You should have something that looks like a loose onion gravy in the bottom of the pan. Add your cauliflower and sweet potatoes, swirl the pan briefly (no need to stir at this point), and cover the pan tightly. Reduce the heat to medium or medium low. Set a timer for 10 minutes and let the vegetables steam undisturbed for that length of time.Primal Chicken Curry in Skillet

When the timer goes off, remove the lid and stir the vegetables. Since the pan may be full, it might be easiest to lift the vegetables up with a nonstick-safe spatula and turn them over in the pan, rather than trying to stir them in a circular motion. Turn the vegetables until the curry coats everything in the pan (the turmeric in the curry will turn everything yellow, as seen below). Replace the lid and reduce the flame to medium-low or low and let it cook for an additional 10 minutes.

When the timer goes off, stir as before, and if you see any pieces that are looking uncooked, poke them down to the bottom of the pan. Replace the lid and cook an additional 5 or 10 minutes. You can check after 5 minutes, and if the vegetables are done (easily pierced with a fork), continue with the next step. Otherwise, let it cook an additional 5 minutes.

This time, when the timer goes off, it is time to add the cooked chicken and any juices, and the green peas. Stir everything together and let it heat through. If the curry is seeming a little bit watery at this point, you can leave the lid off to let some steam evaporate. Otherwise, replace the lid while the chicken is heating. This step will probably require about 5 minutes.

When the chicken is heated through, remove the pan from the flame. Add the yogurt, if using. I recommend it, since this dish is very low in fat, and the yogurt adds some richness, but it will taste fine without the yogurt. Quickly chop the cilantro, sprinkle over the top of your delicious Paleo Chicken Curry, and stir it in. Dish it up and serve!

Some notes: The recipe calls for sweet potatoes and cauliflower. If you are omitting the sweet potatoes, you should be aware that cauliflower will absorb much less moisture than the sweet potatoes, so reduce the chicken broth to ½ cup. My favorite sweet potatoes are the white Japanese sweet potatoes, but you can use any kind of sweet potato or yam that you prefer. The Japanese version tends to start discoloring very quickly after being peeled, though, so I usually leave peeling and chopping them until the last minute before I know they are going into the pan (you can see some of the discoloration in my photo above, where the edges of the potato have started to turn dark—and that was only about two minutes after they had been peeled)!Paleo Chicken Curry in a Bowl

With this basic method and a good 12 inch nonstick skillet, you can improvise many different recipes , including cauliflower rice paella and Jambalaya (I’ll be publishing my recipes for both soon). My absolute favorite is the T-Fal Professional Total Nonstick Saute Pan—by far the best nonstick skillet I’ve ever used—and it’s cheap to boot. The only downside is that it doesn’t come with a lid. Luckily, the lid from my 12 inch All Clad pan (not nonstick) fits it perfectly.

One final note: one of the reasons I love this recipe is because it produces plenty of scraps (potato peel, cauliflower core, cilantro stems) that I can feed to my backyard chickens! Please let me know how you like the recipe!

Scraps for my Backyard Hens

Scraps for my Backyard Hens!


Foo Fighters vs. Westboro Baptist Church (AKA Why I Love Pat Smear)

And I’m learning to love Dave Grohl. It seems the Foo Fighters played in Kansas City, and they were picketed by Fred Phelps and his filthy family. I have had some personal experience with these people; when my partner’s cousin was awarded a Matthew Shepard scholarship in Iowa when she was a senior in high school, Phelps and family decided to show up and picket her high school graduation! These people are virulently anti-gay, and they also picket the funerals of soldiers. In the video, you can see the type of signs they carry, including “Thank God for Dead Soldiers.” These people are nuts.

How to Avoid the Painful & Embarrassing Condition Known as “Chub Rub” (Inner Thigh Chafing)

I want to let you know that I have found what I consider to be the perfect solution to the condition known as Chub Rub, or inner thigh chafing. It is dead simple, and it does its job perfectly. It works so well for me that I can actually say it works like magic. If you just want to see the solution without reading the entire post, click here.

Chub Rub

I became intimately familiar with inner thigh chafing (AKA Chub Rub) a few years ago when I tried to start an exercise program. It was the middle of summer in Austin, Texas (where the temperature often exceeds 100 degrees F (in fact, we get about 90 days per year over 100). If you are not familiar with this condition, let me tell you…it is very painful. It is enough to put you off working out for several days at least, until you recover. I imagine that a great many people start an exercise program only to be halted in their tracks when they run into this problem, and that’s a shame because–as I’ve discovered–it’s easy to prevent.

The Cure for Thigh Chafing

Body Glide, the cure for Chub Rub

Body Glide, the Cure for Chub Rub!

I tried many different products on my way to finding the perfect solution to this problem. I tried spray-on powders, regular powder, and various brands of creams and lotions, but none of them worked very well. It was only when I found a product called Body Glide that I finally found the thing I had been looking for. It is a stick (sort of like a roll-up solid underarm deodorant stick) that contains allantoin. To apply it, you simply rub it on the area(s) that might become chafed, and that’s it! It is resistant to sweat and it doesn’t feel the least bit greasy or slick or anything. It is unscented, and it doesn’t contain any ingredients like mint to make it feel “cooling” or “tingling” (something I don’t appreciate–I don’t really want my thighs or anything else between my legs to *tingle*, thank-you-very-much!); in fact, it’s hard to tell that you’re wearing anything at all, except that you won’t see any of the chafing or blisters or rashes that you might otherwise develop.

If you are going to go out for a walk or a run, especially during hot weather, this product can be a lifesaver! I also recommend using it if you’re going to be spending a long afternoon walking, such as at a street fair or an amusement park, or if you work outdoors during hot weather. I used to work at an outdoor café, and I used this product every day. In fact, I’ll admit it now: I still use it every day. It’s difficult to find locally (and it’s usually much more expensive), so I recommend buying it at Amazon.  Here in Austin, you can find it at Mellow Johnny’s (Lance Armstrong’s bike shop), but it was twice the price, and they were frequently out of stock.

What is Chub Rub?

When you are overweight, you tend to carry some extra fat around your upper thighs, including the inside of the thighs. As you walk, the skin that covers this bulging area rubs against the skin on your other thigh, and you can develop a friction rash. This can happen at any time, but it tends to be worse in the summertime, because it’s an area that is not well ventilated. The sweat collects there until the area is pretty much damp, and the sweat increases the amount of friction you experience…by a LOT! It can be so painful that you end up waddling back home, trying to keep your legs apart to avoid the pain, which is very embarrassing.

Of course, it is not only people who are chubby who experience this. If you are a thin person who runs long distances, you are likely to experience some of the same type of irritation, especially if you wear ill-fitting clothing. It is not necessary to have skin-on-skin contact to develop a friction rash. Ill-fitting clothes that rub your skin can lead to the same type of irritation. Experienced marathoners know this, and so they take steps to shield the places where this irritation is most likely to occur, such as nipples (shirt rubbing back and forth over a long period of time) or underarms (arms swinging back and forth as you run—this is especially true for men with a “V” shaped chest, where your lats will rub against your triceps and develop an underarm rash). Many women who wear skirts also experience thigh chafing as they go about their normal daily routines.

You can avoid this type of irritation without using any type of product by wearing tight-fitting clothing (as in skin tight, so that it doesn’t move around on your body at all) that is made of a fabric like spandex or nylon (think of bicycle shorts), but this is probably not an option for most chubby people, because they’d be too embarrassed to wear such tight clothing.

One more little known tip: Body Glide (and allantoin) are not just a preventative for chafing…they also work as a cure for people who have an existing friction rash!  So if you have already gotten the dreaded chub rub, spread a little of the BodyGlide over the affected area, and it will soothe the stinging and burning, as well as help speed up the healing process!

My Go-To Weeknight Primal Beef Stew Recipe

This Primal/Paleo Beef Stew recipe has become one of my favorites, and I make it at least once a week. It requires a pressure cooker, so if you don’t have one, I recommend the Instant Pot Multifunction Pressure Cooker, which is one of the newer electric safety countertop pressure cookers. It is nothing like the old pressure cooker that your grandmother (or great-grandmother!) fretted over because she was afraid it would explode. It has a tight fitting lid with a safety lock so that the lid can’t be removed until the pressure is entirely released, and I use it several times a week. A big bonus is that you can use it all summer long without heating up your entire house, since the heat is retained in the interior rather than being released into the air as steam. It is well worth the price, which was under $100 at the time I was writing this. You can also use a stovetop pressure cooker if you like (Please note that it is possible to cook this stew without using a pressure cooker; details at the end of the article). Total cooking time with a pressure cooker is about an hour (mostly hands-off). Back to the recipe:

Primal Beef Stew

I developed this recipe on my own, and I can honestly say that I’ve never made a bad batch. There are several options for changing it up, so I will lay out my favorite version, and then mention some of the different ways you can customize the recipe. I specify amounts for each of the ingredients listed, but know in advance that most of these things can be adjusted to taste very easily.

Ingredients:

  • Beef stew meat (2 or 3 pounds–grass fed stew beef is the most healthy, if you can afford it)
  • 1 large onion, chopped
  • 6 or 8 cloves of garlic
  • 2 teaspoons table salt
  • 1 teaspoon ground black pepper
  • 1 cup red wine (or chicken broth or beef stock or water or Guinness beer)
  • 1 to 2 pounds of carrots, peeled and chopped into ¾ inch slices/discs
  • 2 or 3 bay leaves (optional)
  • 1 pound parsnips, peeled and cut into ¾ inch slices (approximately)Chopped Carrots

And the recipe? Add the first seven ingredients to the pressure cooker and stir. The size of the carrots is not too important, and I actually prefer a mix of sizes. The pressure cooker will cook them well, but larger chunks will retain a bit of firmness, while smaller pieces may be quite soft at the end. Using beef stock or water or chicken broth as the liquid will give your stew a more traditional flavor, while red wine will give it a sort of beef burgundy richness. I have lately been using Guinness beer, and I think it makes a great alternative.  After stirring, tuck the bay leaves down into the meat (if using). Put the lid on and start the pressure cooker on high. Set the timer for 40 minutes. If you are using a stovetop pressure cooker, start timing after it reaches pressure.

Once the first 40 minutes is up, carefully release the pressure (being careful not to burn yourself with hot steam—I use a wooden spoon handle to do this). When the steam is released and the safety latch opens, take the lid off and add the parsnips. Stir until mixed, breaking up any beef chunks that have stuck together. Place the lid on and cook on high for 9 or 10 more minutes. At the end of the cooking time, you can either let the pressure reduce on its own, or you can release the steam if you want to serve it quickly. Taste the stew and adjust the salt and pepper or other seasonings if necessary.
That’s it! You’ve just made some delicious and totally paleo/primal friendly beef stew with about 10 minutes of actual work (chopping and stirring), and less than an hour of cooking time.

Now for the ways you can customize:

Parsnip Beef Stew

If your parsnips are thick, cut the discs in half.

I prefer a thick stew without too much liquid (you MUST use some liquid in a pressure cooker, or the food will burn, by the way), so if you prefer a more soupy or brothy stew, add another cup or so of liquid (but be aware that whatever liquid you add will not escape as steam, since it is sealed tightly, and the meat and vegetables will release some liquid as they cook, so the finished stew will look more liquid-y than what you see in the pot at the beginning).

I specify parsnips because I love them, and think they give a great flavor to the stew. If you’ve never had them, they’re kind of like a super-carrot, or a very strongly flavored carrot that is a bit perfume-y. They look like a carrot, but they’re white instead of orange. If you don’t like parsnips , or if you can’t find them (it’s harder to find them during the summer—here in Austin, Whole Foods doesn’t have them year-round, but Central Market does), you can substitute either rutabagas or turnips with excellent results; just cut them into ½ to ¾ inch dice and add them during the last 10 minutes in place of the parsnips. The reason for the divided cooking time is because the vegetables that go in at the end are softer, and if you cooked them for 40 minutes in a pressure cooker, they would completely fall apart into mush, whereas the carrots are much more firm, so they can take a longer cooking without dissolving. Turnips and rutabagas are a bit firmer than parsnips, but they should still be entirely cooked in the allotted 10 minutes. You could also add cauliflower (I have done it before when I didn’t have anything else on hand), but cauliflower is quite delicate, and if you cook it for longer than 5 minutes in a pressure cooker, it will dissolve, so just shorten the cooking time. The meat will be entirely cooked during the first 40 minutes, so the last 5 or 10 minutes is not even necessary. If you want just a beef and carrot stew, simply stop the cooking at 40 minutes and you’re done!

One last tip: the parsnips tend to start becoming discolored after they are peeled and chopped, so I usually wait until the first 40 minutes is up and then peel and chop them quickly.  Parsnips are also quite variable in size, unlike most carrots.  A parsnip might be an inch and a half thick at the top, only to taper quickly to a quarter-inch point.  With thick parsnips, rather than cutting them into discs, I cut the thicker part off and cut it in half before cutting it into half moonshapes, and then cut the thinner part into discs.

Primal Beef Stew

Primal Beef Stew

Without a pressure cooker: if I were going to spend all day cooking beef stew, I would not follow this recipe.  I would first brown the meat in small batches on all sides to develop some flavor and fond in the pot, and then I would simmer the ingredients for two hours or longer, long enough to give the collagen and connective tissue a chance to dissolve (stew meat is usually a mix of different cuts, and it usually includes a fair amount of connective tissue).  The recipe above takes several shortcuts in order to make it an easy meal to make on weeknights.  If you have all day, you can follow the steps above, but brown the meat in batches, then add your wine or broth and scrape the browned bits off the bottom of the pan (this will add flavor to the broth), add the ingredients as described in the first cooking period above (onions, garlic, beef, carrots, liquid (wine or broth or water), bay leaves, salt, pepper) and place the lid on the pot.  Then place it in an oven that is set at 325 degrees F for two hours or longer.  Add the parsnips or other ingredients and put it back in the over for another 30 minutes.