Category Archives: Uncategorized

The Time I Wrote to Jack T. Chick Publications to Ask Their Opinion of Men Wearing Hairspray

Years ago, around 1991-92, religious crazies used to stand on Broadway on Seattle’s Capitol Hill (usually near the corner of Broadway and Olive) and hand out religious tracts. But not the normal, boring religious tracts—these people handed out the mini religious comic books from Jack T. Chick publications. You may be familiar with these little booklets, since people have been leaving them in public restrooms for years. I was always excited to find these people there because these comics were so ridiculous and over-the-top that I wanted to collect them all, despite the fact that I disagreed with them completely and am basically allergic to religion, so much so that I would probably skip your wedding if you told me you were going to hold it in a church. I passed this corner regularly, and eventually I had a fairly sizable collection of these tracts, but usually I kept getting the same few tracts that were specifically targeted at Seattle’s gay community.

In 1992, I moved to Olympia, WA, so I was cut off from my steady supply of free comics. I decided to write a letter to Jack T. Chick publications to see if they would send me a sampler. The whole package was available for $40, I think, which I couldn’t afford, but I thought $10 might get me a pretty good collection. Because I was a sassy young thing, I decided to send my money in with along with a letter, hoping to get a response from Mr. Chick himself. Here is the letter I sent, written in the voice of a semi-literate religious nincompoop:

“Dear Jack T. Chick,

Thank you so much for you’re comic books. They save soles all the time! I give a copy of DOOM TOWN to a boy that works at a Rock and Roll RECORD STORE and now he nose Jesus is Lord of ALL! He quitted his job and is a SAVED MAN because of you.

I want to get som more of your tracks. They are so good. I am now ready to start my new minustry where I will be saving the little teenage heathens that ride around in my town Olympia Washington on skate boards. I no those things are put here by the Devil. Do you have any comics about how skate boarding will send people to HELL? If so I would like a sample. So you can send that to me if you have it.

I am very poor because my minustry only has one member thats me. I am giving $10 to you so I can get some more little comics. Send them in a hurry! Expecially the skate boarding one that I don’t no the name of. I am so afraid one of these cute young boys is going to break his neck before I can Save him with your book. I tell them every day it is just a instrement of SATAN but they don’t listen to me not like your books!

Hurry,

Angus B.

P.S. I no that makeup is a sin for a man to wear but what about hair spray? Does that count? Also moisturizer! I think that’s not good if they put it on their face. I’m not sure about hand lotion. I say it’s OK if it’s Jergen’s but that fancy kind is defenitly BAD FROM SATAN! Am I right?

P.S. #2 What do you think about Billy Clenton? Is he part of the end? Like the Pope? I don’t no anything about it, but I do no something!

Also I wood like to get a sample of This Was Your Life! in Latvian. My church is putting some missionary over there and they told me to ask you about getting some of your affecteve tracks for those heathen. But they want a sample because of nobody in Africa could understand those last ones we bought.

P. S. #3- Do you print any comics in Yiddish? I think we should Save EVERYBODY EVEN IF they don’t deserve it!

Thanks,

AB

I provided the name of my ministry (Disciples in Christ Kleansing Sinful Souls), and signed with the acronym. I was dearly hoping to get a letter from Mr. Chick that began, “Dear D.I.C.K.S.S.”, but, alas, I didn’t get any sort of personal response, just a large packet of tracts along with a catalog and order form.chick address

I still want to know what Jack Chick thinks about hairspray on a man.

Time for an Update…I Lost Over 40 Pounds in the Last Year!

That’s right. I really should update this thing more regularly! I began about a year ago, and my plan was to be in good enough shape that I would feel comfortable walking around shirtless at Southern Decadence this weekend. Did I reach my goal? Not exactly, but that has more to do with my body image issues than my size. I weighed myself shortly after starting on this journey, and I have lost 43 pounds so far. I still have another 15 or 20 to go before I’m totally happy.

So how did I do it? Well, I did not follow the Primal Method precisely. I walked more than before, but not every day and not consistently. Many of my walks were only one or two mile walks. I did not lift weights more than about a dozen times last year. The biggest change I made was cutting out the grains and sugar, and it is THAT change to which I attribute my weight loss. I am much thinner than last August. I will take some pictures and put them up soon. But first things first. This weekend is Southern Decadence! I will be there from Friday until Monday, and I hope to see a whole bunch of people there! I love New Orleans, and I am so excited that the bad weather hit a few days before the festivities this year. I will write more when I get back, and I hope to have some photos to share of my weekend at Southern Decadence!

The Most Obvious News Story of the Year: American Idol Looking to Replace Jennifer Lopez and Steven Tyler, Who Have Rightly Abandoned the Ship They Helped to Sink

I saw a news story today under the headline “American Idol Seeks Replacements for Departing Judges Jennifer Lopez and Steven Tyler,” and I immediately thought: duh.  The most popular show in America, which has always had three or four judges (remember that ill-advised Ellen Degeneres season?), announces the departure of two of its judges, so of course they are going to ‘seek to replace’ them. Nobody wants to watch Randy Jackson as the solo judge of any competition.

The next news stories will be feelers for different potential judges. They will be leaked carefully to the press in order to judge public opinion. Two years ago, Jennifer Lopez was their apparent dream candidate, and Steven Tyler was a sort of surprise contender. They both have large fan bases that they couldn’t afford to alienate, so neither of them was able to fill the shoes of Simon Cowell, who has always been the sole voice of reason on the show.

Simon’s disappointing results with the first season of his own show, which I’m pretty sure is called ‘The X Factor’ (and really, I couldn’t watch more than a few episodes, even though I thought that British host was kind of cute), should make the way forward clear: one more season of “The X Factor,” followed by a period of unrest and rampant speculation, immediately followed by the announcement of Simon Cowell’s return to American Idol, for which he will be (and should be) paid something like $80-100 million dollars per season (while this seems INSANELY high, to put this in perspective, Dolly Parton was paid $40 million per season for starring in a show that lasted only a single season during the 1987/88 TV season—TWENTY years ago!). Is Simon worth it? If he can turn this foundering ship around, then HELL, YES, he’s worth it.  I tuned out when Simon left, because, really, who wants to watch Jennifer Lopez and Sleazy Gramps (Steven Tyler) try to tell somebody they suck without hurting their feelings?

So hire Mayim Bialik or Soleil Moon Frye for all I care, because the next season is just filler anyway.

If you want to know who I’d REALLY love to see judging the show, then:

  1. Not Randy Jackson
  2. Velma from ‘Scooby Doo’ (voiced by Mindy Cohn, who was Natalie on ‘Facts of Life’)
  3. Tony Danza (because he’s still so easy to look at).
  4. Robert Rey, ‘Doctor 90210’
  5. H.R. Pufnstuf
  6. Charles Nelson Reilly (even though I know he’s dead—hell, hire the ghost of Paul Lynde while you’re at it).
  7. Roddy McDowall (as Cornelius from The Planet of the Apes)
  8. John Waters
  9. Kevin Smith (I actually think this would be fun/funny to watch).
  10. Pat Smear

Primal Chili Pork Verde: Mexican Pork Stew with Green Chiles

This is one of my favorite Primal Recipes, one which is very simple to make. It is easy to assemble and cook, requiring nothing more difficult than chopping some vegetables and meat. It does require a pressure cooker for the method I recommend, but you can do the same thing with long, slow simmering, but plan on the recipe taking about four hours rather than the one hour required in a pressure cooker. Also please note that the heat factor of this recipe is pretty mild despite the presence of several kinds of chile peppers, but I offer some ways you can boost the heat at the end of the recipe if you so desire.

Primal Chile Pork Verde, Ready to Eat

Primal Chili Pork Verde Recipe

Ingredients:

Pork (I often use a pork butt roast), about 3-4 pounds

3 Poblano Chile Peppers

3 Jalapeno Peppers

3 Serrano Peppers (or 3 more Jalapenos if you can’t find Serranos)

½ pound Tomatillos

1 Onion, minced or diced

5 or 6 cloves of garlic, minced or put through a garlic press

Salt & Pepper to taste

Lime juice from 2 fresh limes

Toppings:

Chopped Cilantro

Diced Avocado

Shredded Cheese (I use a pre-shredded Mexican Cheese blend)


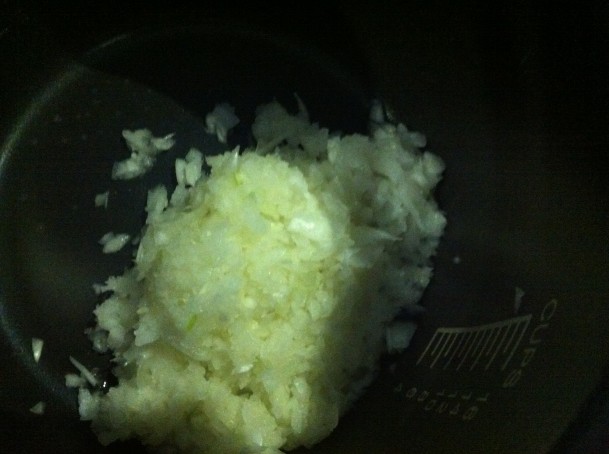
To begin with, you need to chop or mince the onion. Since the later part of the recipe requires using the food processor, I just toss the onion in and give it several fast pulses until it is broken down into small pieces. Then transfer the onion to the pressure cooker vessel.

Minced Onions

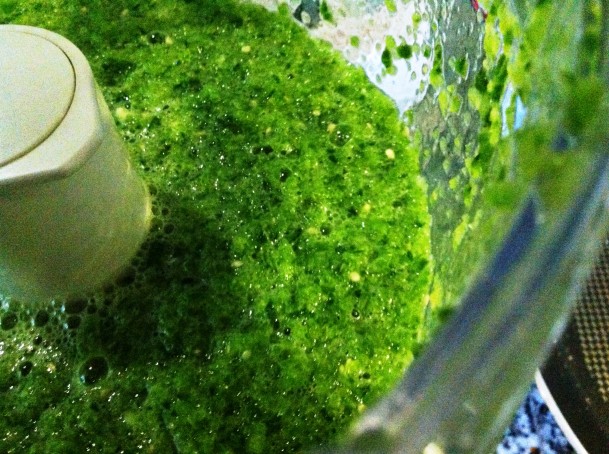
Next, clean and seed the peppers. Discard the seeds and add the flesh of the peppers to the food processor fitted with the blade attachment. Chop the tomatillos in half and add them to the food processor. Add one cup of water and turn the processor on. Process until the peppers are fully broken down and partially liquefied, about one or two minutes.  (You may add more peppers if you choose; the recipe as designed is actually not very spicy, but you can add more jalapenos either now or at the end if you prefer it spicier).

Transfer the pepper mixture to the pressure cooker.

Pureed Chiles for Chile Pork Verde

Now you need to break down your pork meat into stew sized pieces. I often start with a whole pork butt roast, and then chop it into pieces about ¾ inch cubed, but you can make the pieces smaller or larger, depending on your preference. I am careful to discard any tough or fibrous or gristly pieces I come across. In Texas, we have a store called HEB that sells cryovac packages of pork meat labeled “Carnitas”, and I often use that meat (which comes in multiple large chunks) instead of the pork butt because it is cheaper and similar in quality. Feel free to use any cheap cut of pork, because the length of cooking in the pressure cooker will tenderize almost any cut of meat, but be careful not to pick a piece that is too lean, and make sure when you are picking out the tough parts that you don’t discard too much fat. This dish requires some fat to make it rich and flavorful.

Add your pork to the pressure cooker vessel. Then add your minced garlic. Add salt and pepper to taste (and don’t be shy with the salt—remember that it needs to flavor three or four pounds of meat)! Squeeze in the juice of one lime. Give everything a good stir and then place the vessel in the pressure cooker. Set the cooker on ‘High’ and cook for 55 minutes.

Meat and Chiles Ready to Go Into Pressure Cooker

After the meat is done cooking, you will want to carefully release the pressure and then give everything a good stir (the meat tends to stick together in the center of the pot during cooking, but it breaks apart easily).  Let the meat cool for a few minutes as you assemble the toppings.

I choose to use diced avocado and chopped cilantro as the toppings for my primal chili pork verde, but you can use whatever you want. Many families will traditionally serve this green pork stew over rice or over tortilla chips (corn chips), so if I’m making this for a crowd, I will often offer that on the side (and simply skip it myself). I also put shredded cheese on top of mine. I know a few people who like to add a dollop of sour cream, and it sounds good as I write it, so I think I will try that next time! One thing to note: cilantro can taste kind of ‘off’ or soapy if it sits around for a long time after being chopped, so I usually chop it at the very last minute.

Diced Avocado and Chopped Cilantro, Toppings for Chili Pork Verde

Just before serving, stir in the juice of one more lime to give the dish a bit of brightness. Feel free to add some finely minced peppers at this point, too, if you prefer it on the spicy side—the long cooking mellows out the heat of the cooked peppers, so adding some at the end is an easy way to boost the heat. You can even offer the minced peppers on the side so your guests can doctor their stew to their own desired heat level.

Primal Chili Pork Verde with Toppings

This dish is great as leftovers, and it reheats beautifully, but the avocado and cilantro don’t hold so well, so I will usually chop some fresh toppings to go with the leftovers on the day I am serving them. This recipe is so good that it makes me glad that I follow the Primal Blueprint method rather than trying to figure out how to make a Paleo friendly pork stew recipe, because how could you possibly make this without using any chile peppers? I simply couldn’t give up healthy, flavorful, and nutritious peppers!

Double Cream Recipe: How to Make Double Cream…or Can You Just Substitute Heavy Cream?

The British love cream in all its varieties, from clotted cream to double cream to Devonshire cream (or Devon cream), to Cornish clotted cream and many other varieties. It’s enough to make your head spin, and it’s particularly confusing if you’re an American trying to follow a British recipe. I recently ran into this problem when I was trying to make a delicious-looking and –sounding lemon tart that was featured on an episode of “How to Cook Like Heston” with Heston Blumenthal. It called for double cream, which sent me on a quest to figure out: can I just substitute heavy whipping cream for double cream? The answer is no. But I have found a solution…

A Cream Maker.

I actually started looking into this gadget several years ago, but never bought one because they were mostly offered on the UK version of eBay, and the shipping was prohibitively expensive. This is a simple, old-fashioned gadget that does its one job perfectly, and that job is to make double cream (or single cream or extra thick double cream or any of the other varieties of cream) out of plain old milk and unsalted butter. Basically, it re-homogenizes the fat into the milk. It came into popular use during World War II, when rationing led to cream becoming almost impossible to find. People could get their standard ration of milk and butter, but no cream. Since butter is nothing but milk fat that has been separated from the liquid portion of the milk, it stands to reason that putting the butter back into the milk would reconstitute the cream, but the process is tricky. You can’t just stir it together, because the melted butter floats. You can’t shake it together, because that is actually how the butter is created in the first place—shaking only forces the sticky butter to cling together. What you can do is force the liquid butter and milk through a fine nozzle a bit at a time under pressure, and this will recreate the original cream.

I finally found an old Bel Cream Maker on eBay in the US, and it looked completely unused. I was excited to give it a whirl when it arrived in the mail today. I washed and assembled the parts, and followed the directions in the accompanying original brochure, and I soon had extremely thick double cream! I document the recipe and procedure below.

If you want to buy one of these gadgets for your own use, here are some tips: they were most commonly made by a company called Bel. You can also find an attachment for a Kenwood mixer that does the same things, but that’s only helpful for people who have such a mixer. Anybody can use one of the Bel cream makers. When searching on eBay, you find a wide range of conditions and prices. These usually go for around $10 to $20 US, but I’ve seen sellers who think they can get $50 to $300 for them just because they are cute and vintage. I can assure you there is no need to pay that much! Several of these come up for sale each week, so just be patient and check back and you’re bound to be rewarded.

You will find many more “ice cream makers” than cream makers, so it’s best to find a way to filter those out. One of the Bel models was called the Jubilee, and many of the older models are made of Bakelite, so the best search I found was the following (leave all punctuation and spacing intact):

(bel,jubilee,Bakelite) “cream maker”

What this search is telling eBay, just in case you don’t know how eBay advanced search works, is: show me any items that have any of the words bel, jubilee, or Bakelite AND the words “cream maker” in exactly that order. In essence, this gets rid of the glut of whipped cream makers and ice cream makers so you don’t have to wade through them. Now on to the Recipe (*see note at the end regarding different measurements or percentages of butterfat–one of my helpful readers actually created a calculator that I will link to)!

Double Cream Recipe:

Double Cream is 48% milkfat. The highest percentage milkfat available in the US is typically 36%, so it doesn’t substitute. Once you have your cream maker in hand and assembled and ready to go, follow these steps:

Weigh or measure out:

4 fluid ounces of milk (100 ml)

5 ounces of UNSALTED butter (you don’t want salty cream, do you?) (140g), cut in pieces

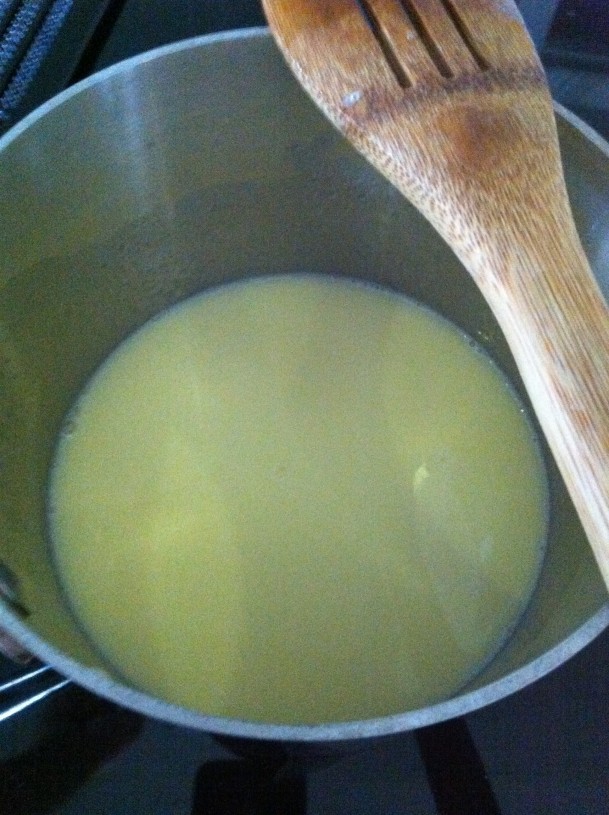
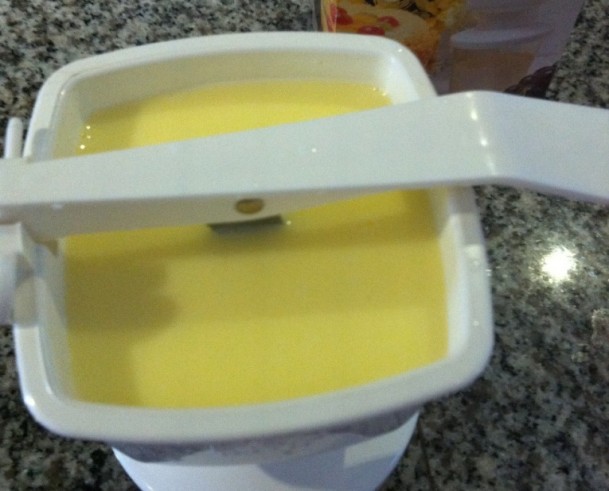
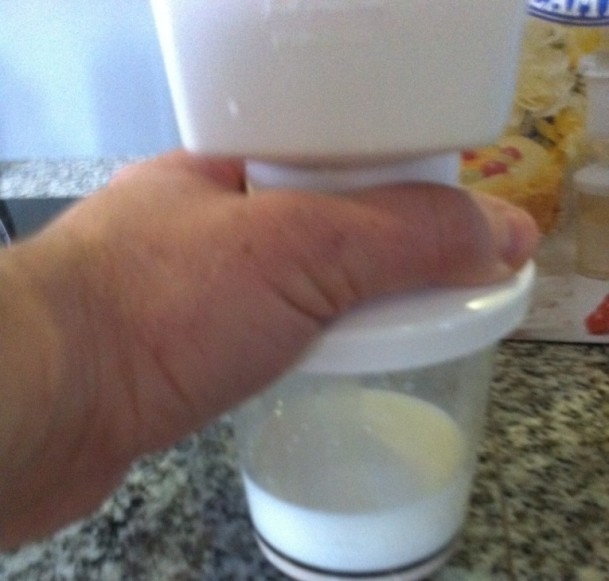
Put these two ingredients together in a small saucepan and heat gently over low to medium heat. You do not want to boil or scorch your milk because it will change the flavor. If you keep the temperature below 180 degrees F, that is best. You can remove it from the heat once the butter is about halfway melted and the residual heat will continue melting it. Once it has been completely melted, stir it and then quickly pour it into your cream maker. Next, hold the maker FIRMLY with one hand (you need to pump the handle of the thing up and down with some force, so you will need to keep a firm grip on the base of the thing to prevent any spills). Pump the handle. If nothing is coming through into the chamber below after a few pumps, stop pumping, carefully take off the lid from the base, and adjust the nozzle nut by loosening it slightly. Reassemble and start over. Once you see something coming through (you should probably see about ½ teaspoon of cream being created with each pump), continue pumping until all of the milk and cream have been forced through into the lower chamber of the cream maker. Congratulations! You just made Double Cream!

Here are some photos I took while I was making my first batch, along with some photos of the resulting THICK cream (it became much thicker after cooling):

The box my Bel Cream Maker came in (mine seems to be from around the 1970’s, which is around the time the company stopped making this item, it seems, judging from availability).Bel Cream Maker

Melting the butter.  After heating it up and removing if from the heat, you can let it sit for a few minutes.  You can see some of the remaining small pieces of butter sitting in little yellow pools of melted butter. Once you stop seeing those little pools of melted butter appear, your butter is ready to go.Melting Butter for the Bel Cream Maker

All melted, no more pools of yellow butter on top:Melted Butter

Poured into the Bel Cream Maker:Butter Poured into the Bel Cream Maker

The first bit of cream:Bel Cream Maker Making Cream

All done. The final product. This cream is about twice as thick as American Heavy Cream. I can’t wait to try the Heston Blumenthal Lemon Tart recipe (it appeared on Episode 2 of “How to Cook Like Heston”, the “Eggs” episode). One commenter pointed out that the cream looks a little thin. Please remember that it was still warm in this photo, and it thickened considerably after being chilled.Glorious, Thick Double Cream Made with Bel Cream Maker

Of course, the tart recipe is not one of my normal Primal Recipes.  It’s one of my “cheat day” recipes.  I plan to use the eggs from my amazing French Marans hens to make this incredibly rich looking custard tart.  Can’t wait to try it.  If it’s as good as I hope, I’ll share the recipe.

*Note on measurements and percentages of butterfat: I have had many questions from readers regarding different percentages of butterfat, or what they could subsitute to come up with the preferred 48% of double cream. One of my readers, Matt, actually made a calculator that will help you with any such questions! You can find it here. It will open up pre-populated with 80% butterfat (the percentage in plain butter) and 3.25% fat (for whole milk). If you are using this calculator, you will want to leave the 80% for butter, but you could change the milk fat percent to 12% for half-and-half, or 0% for skim milk, 1% for 1% milk, etc. You can even change the desired volume, depending on how much double cream you need. Very handy! Thanks, Matt, whoever you are!

Washington State Voters Pass a Law that Ends State-Run Liquor Stores, Allows for Private Liquor Shops

I used to manage a tavern in Washington state.  A tavern is a specific designation that means a bar that serves only beer and wine—no hard alcohol.  In order to serve the hard stuff, you had to be a restaurant, meaning that all real bars served food, although you might never know it.  They were required to keep stock and a menu of about 10 entrees on hand at all times, and offer food during most of the hours they were open.  The laws in Washington were old and antiquated, and I think it’s a good thing for the state’s residents that this law was passed.

The state liquor control board had moved in recent years to modify some of the laws.  One change was the nightclub license that allowed bars to serve alcohol without serving food.  But it was too little, too late, in this case.

People in other states don’t really understand what it means to have to buy alcohol from the state.  It meant that all liquor stores were the same, with the same prices, and they had pretty much the same stock.  The employees were state employees, and the stores were run like a clean, brightly lit cafeteria.  To say they were uninviting would be an understatement.  In California, people are used to walking into Safeway or Walgreens and buying their vodka and whiskey.  In Texas, you can’t buy liquor at a regular grocery store, but there are plenty of private retailers with a wide variety of styles, from fancy boutique shops, to neighborhood liquor stores, to giant wal-mart-like mega stores (Spec’s Liquors).

The way the initiative came to pass is an interesting story, and it could certainly be unsettling, except for the fact that I am in total agreement with the need to get rid of the old laws.  Costco, which is based in Washington, simply bought the election.  They spent $20 million dollars of their own money (meaning they spent something like $4 for each and every likely voter in the state) to get this law passed.  Similar laws had been defeated because of the specters of teenage drinking and increased drunk driving.  This time, with Costco’s strong financial backing, the retailers won.

By June 1st, Washington will close all of its state-run liquor stores, and the citizens of Washington will be able to go to Costco or Safeway to buy their liquor.  They are likely to see much cheaper prices, because part of the law allows retailers to deal directly with the distilleries, whereas before, all alcohol had to go through a liquor distributorship, which added one more level of profit that needed to be passed along.  Costco has enough power that it can get great deals, so I imagine that many people will be seeing a 35-to-40% decrease in prices.

Is it OK for a corporation to buy an election? No.  I don’t think it is, really.  In this case, however, I applaud the result.

My Favorite Recipe from The Primal Blueprint Cookbook: Cabbage and Sausage!

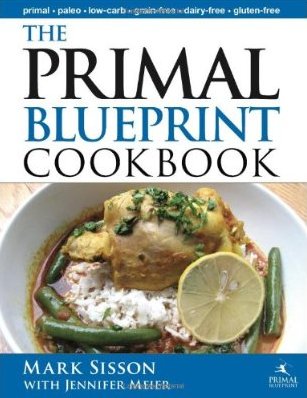
It may strike you as funny or a bit odd that I would say this was my favorite recipe from the excellent The Primal Blueprint Cookbook by Mark Sisson and Jennifer Meier.  It would have struck me as pretty funny about nine months ago, too.  I grew up in a family that simply didn’t eat cabbage.  I knew people who did, and I remember jokes from my childhood about how boiled cabbage smells (it can smell sulphurous, a bit like a rotten egg), but nobody in my family ever cooked it, on either side, from my great grandparents on down.  It just wasn’t part of our diet.Primal Blueprint Cookbook

I’d always assumed that my family avoided cabbage because it was simply no good.  I remember having it at a friend’s house when I was young, and it was terrible—her mother had boiled it to mush.

That’s why this recipe was such a revelation to me!  It is so simple that I thought it was kind of a throw-away, just something added because they were trying to meet a minimum recipe quota.  Still, the simplicity of the recipe (it only has four ingredients) appealed to me, so I gave it a try, and it’s now one of my regular recipes.  I’m so glad cool weather has finally come back to Austin so that I can turn my oven on and make cabbage and sausage again!

This could be called a two ingredient recipe, since the only two required ingredients are cabbage and sausage.  The other ingredients are optional.  They are butter and salt.  If you want a more Paleo friendly recipe, you could leave out the butter and go with a lowfat sausage, but I prefer mine primal—I add dabs of butter all over the top!  I do go for an excellent sausage, though.  I’ve tried making it with pork Andouille, and I liked it a lot, but my favorite sausage for this recipe is one that I get at Whole Foods.  It’s called Pederson’s Sweet German Sausage, and it tastes great!  It’s lightly smoked, and, despite being called “sweet”, it has less than one gram of carbohydrates per serving, so it’s a low carb sausage as well (I should point out here that my boyfriend Michael prefers the Pederson’s Smoked Jalapeno sausage, so we usually go back and forth between that one and the Sweet German for the sake of variety).

It turns out that I love cabbage, which is great, because cabbage is full of nutrition.  And when cooked this way (roasted in the oven), it doesn’t give off that stinky sulfur smell.  The recipe takes me between 45 minutes and an hour to finish, but the actual work time is truly only about five minutes, so most of the time is simply spent waiting for the oven to do its job.  Here’s my version of the recipe, which might vary slightly from the book version.

Primal Cabbage and Sausage Recipe

  • 1 Head of Cabbage (I prefer a cabbage that is on the “looser” side—not quite so densely packed—so if it feels like a bowling ball, choose a different one)
  • 1 sausage, approximately 12 ounces to 1 pound in weight—I go for fully cooked sausages only for this recipe
  • Salt to taste (varies depending on the sausage you choose)
  • Butter—about 4 tablespoons, cut into pats

Preheat your oven to 350 degrees Fahrenheit.

cabbage and sausage

To assemble the dish, cut the cabbage in half by bisecting it through the core, so that it comes apart into two halves.  This will allow you to see how deeply the hard core runs.  Take a paring knife and cut away the core and discard (I save this and give it to my backyard hens).  Next, take a large chef’s knife and cut each cabbage half into strips about ½ inch to ¾ inch wide.  Chop the other half in the same way.

Take a large baking dish such as a 9 x 13 inch Pyrex dish and butter the bottom and sides.  Add the chopped cabbage to the dish.  Sprinkle it with salt.

Next, chop your sausage into rounds about ½ inch thick.  You can do this on the bias or straight through the length, depending on your preference.  Sprinkle the sausage over the top of the cabbage.  Sprinkle the butter (if using) evenly over the top of everything else.  Cover tightly with aluminum foil and place the dish in the oven and cook for 40 minutes.

cabbage and sausage with butter

After 40 minutes, remove the foil carefully by lifting it away from you, so the escaping steam doesn’t burn you.  Discard the foil.  Toss the cabbage and sausage with some tongs.  Put it back in the oven, uncovered, for 10 more minutes.

This next step requires you to use your judgment.  When the 10 minutes has passed, take a look at the dish and see if it looks done.  Some cabbages are more watery, so if it’s too watery you can put it back in the oven for another 10 minutes.  If it looks done to you, it’s good to go.  Whether you want to cook it more at this point is truly a matter of preference.  If you want the cabbage to be very soft, you can continue cooking it.  If you prefer it with a bit of crunch, you can stop cooking as soon as it looks done.  I have tried it all different ways, and I prefer it somewhere in the middle—I like it cooked all the way through so it is soft, but not to the point where it starts to become browned.

cabbage and sausage cooked

Once it’s done to your satisfaction, toss it again and serve!

I hope you enjoy this recipe as much as I do.  If you are starting out on the Primal Method, then I think The Primal Blueprint Cookbook is a must-have.  It is filled with simple and delicious recipes like this one.

Sister: A Novel by Rosamund Lupton is Crippled by Its Own Artifice

I just finished reading Sister: A Novel, by Rosamund Lupton.  The book has gotten generally very good reviews, but I found it to be a pretty big disappointment.  The book has a very specific literary device that it relies on for its structure, and I found the device to be both confusing and annoying.  This could be because I read ebooks on my iPhone, and perhaps the font was too small to pick up on the all-important quotation marks.Sister A Novel by Rosamund Lupton

The device is this: the story is told in the first person as if it is being spoken or written (it is not made clear which).  The main character, Beatrice, is speaking to her recently-deceased sister, Tess.  She is telling Tess the story of how Tess’s body was discovered, and how the police believed that she had committed suicide.  Beatrice is the only person who believes that her sister was murdered.

The novel suffers terribly from a form of past/present/future tense vertigo.  Beatrice talks to her dead sister about the distant past and the recent past in one sentence, and in the next sentence, she is speaking in her own voice in the present tense.  She “speaks” one sentence to Tess in her head, and then the next sentence is spoken aloud to another character, and the only cue that she is now actually speaking aloud is those pesky quotation marks.  If you happen to miss the begin quotations, you will find yourself reading along, thinking Beatrice is “speaking” in her head to Tess, only to realize that she is actually in a conversation with another character.  This happened to me throughout the book.

If the plot device sounds confusing or convoluted, please realize that it is even more convoluted than it sounds here.  To hold any sense of mystery, it is necessary for the story to unfold at a certain pace, and for details to come to light.  Of course, since it is being told in the past tense, it is clear that the speaker already knows the details, and is speaking to a close relative who has been murdered, and who would therefore probably know who her own murderer was, so for it to be held back as a “secret” to be revealed at the end is simply gimmicky.

And that’s not the only gimmick up Rosamund Lupton’s sleeve.  The ending of the book throws everything out the window and rewrites the entire story.  I’m not saying it’s as annoying or fake as “and then I woke up and realized it was all a dream,” but it’s awfully close.  It comes out of pretty much nowhere and makes no sense at all.  And while “Sister: A Novel” is not a traditional mystery novel, it does play on the tropes of that genre, and one of the basic tenets of successful mystery writing is to have a great ending—to wrap things up in a way that pays off on the reader’s investment in the story up to that point.  The “finish” of this book does just the opposite—it not only goes out with a whimper, the “reveal” actually makes what has come before less interesting.

I do give the author credit for taking a risk.  I appreciate the effort to do something interesting or unusual.  As my old acting teacher Shirley Kaplan would have said, “At least she tried something! At least she had an idea!”  And Rosamund Lupton did have an idea, she did try something…and she failed.  I guess that makes this an “A” for effort, but “C-“ for execution.

Sous Vide Cooking at Home with the SousVide Supreme Waterbath Oven

Sous Vide cooking has become all the rage in the foodie world for one simple reason: it works! Using the sous-vide method, you can cook your food to a very specific temperature, so you know it will never overcook.

Most people think sous vide means to cook in a waterbath, but the literal translation is “under vacuum.” This is because you can’t simply throw a nice Porterhouse steak into a vat of warm water—you have to seal it first. This is usually done by using one of those vacuum sealers that are meant for sealing food for long term storage (they work by sucking all the air out and then heat sealing the plastic bag). After the food has been sealed this way, you can slide it into the water without worry (I use and recommend the FoodSaver Sealer–their bags are BPA free).

So how does it work? It’s basic science, plus a piece of sophisticated equipment. You need a machine that will heat water to a very specific temperature and then hold it at that temperature without fluctuating. Prior to the release of the SousVide Supreme, there was no home-friendly device that could do this. People resorted to buying huge vats and then attaching giant water bath heaters and circulators (to make sure the water in the entire vat was held at the same temperature, and not only the water near the heater). It could cost well over a thousand dollars for this setup, not to mention it took up a lot of space and was unattractive, so this type of cooking used to be pretty much limited to molecular gastronomy restaurants like El Bulli or Chicago’s Alinea.SousVide Supreme Water Oven

The SousVide Supreme Oven, however, is an attractive appliance that sits on your kitchen countertop. It is designed to hold your water at a very precise temperature, without fluctuating more than one degree Fahrenheit higher or lower. What this means is that, if you know you like your steaks medium rare, and the perfect temperature for a medium rare steak is around 135 internal temperature, you set the bath to that temp, let it heat up, seal your steaks in a vacuum sealer bag, and then slip them into the water. Then, you just have to let them come up to that temperature all the way through. The time required depends on the thickness of the steak, but the beauty of this setup is that after the steak is done, you can let it just keep sitting there—it will never get any hotter! Your Sous Vide Supreme will hold your steak at a perfect degree of doneness for as long as you want it to! The temperature is high enough that it will prevent any bacterial growth, so there’s no need to worry about food safety—your steak has basically been Pasteurized after it’s held at that temperature for several hours (this is the same way they Pasteurize raw eggs for sale at the grocery store). When you get home, you simply need to slice the bag open, take out your steak, dry it off with paper towels, and sear it.

The searing step is an important one. While the steak is technically fully cooked and could be eaten as-is, it will LOOK unappetizing, since we are used to seeing meats that have been browned in an oven or by being seared in a pan or over a grill. So we just need to cook the outside of this steak to match our expectations of what a steak should look like. There are several ways you could do the sear. Many people prefer a butane cooking torch like the ones chefs use to melt sugar on top of crème brulees (or is that crèmes brulee? I never took French)!  My preference, though, is to simply heat up a cast iron skillet, add some clarified butter, and drop the steak in and sear it completely on both sides. This only takes about a minute or less per side—you aren’t trying to cook the steak, remember—it’s already cooked inside. Just sear it long enough to cook the outside and give it some nice browning. This not only makes the steak look the way we want it to, the Maillard reaction (which is basically browning due to caramelization) also adds the flavor of the sear that we expect when we get a delicious steak.
I tried both the torch method and the cast iron skillet method, and I have to say that I prefer the skillet. When I used the torch, I could taste the flavor of the fuel on the steak. Most people say they can’t taste it at all, but I definitely tasted it. Which is fine with me—now I have a great skillet that can be used for other things, and I don’t have to worry about buying refills for the culinary torch.

So, is the SousVide waterbath worth it? In my opinion, definitely yes. It does take some getting used to (and it took my boyfriend even longer to get over his skepticism), but sous vide cooking really is a useful tool to have in your culinary repertoire. It’s not that I cook this way every night—chicken is a staple at my house, and it would be hard to make an appealing chicken dish in the sous vide cooker—at least I haven’t found any recipes that appeal to me (if you have, please let me know below, because I’d be interested to try some). But for beef, the Sous Vide is now my favorite method. Especially since I don’t have an unlimited budget, and we often go for what’s on sale; the sous vide method can work wonders on cheap or tough cuts of meat—one of our favorites is 48 hour spare ribs. You read that right—we cook spare ribs for 48 hours. When meats are held at that temperature, enzymatic action speeds up, and after two days of being held at the perfect temperature, a tough cut of meat is turned into a delicious, tender, shockingly good dish.

Whether you are interested in this appliance for yourself, or whether you’re looking for a great gift for a foodie, this oven just might turn out to be not only a useful tool, but a fun plaything.  Like a Kenner Easy-Bake Oven for adults!

Additonal notes:

Please realize that this method requires a high-quality vacuum sealer that seals by heat; it won’t work with one of those cheaper Ziploc type pump bags–they are almost guaranteed to leak if left in a water bath for several hours.

I Just Pre-Ordered My Nest Thermostat—A Thermostat that Programs Itself and Allows Remote Control via iPhone!

I saw this pop up in the news yesterday, and I new I had to have one. I was happy to find that my old (non-programmable) thermostat could be replaced by this new “iPod” of thermostats.
nest thermostat
Nest is the brainchild of Tony Fadell, who is credited as the original developer of the iPod for Apple. Tony took a year’s sabbatical to live in Paris with his wife and kids, and near the end of the year, after thinking about what he wanted to do next, he announced his new project to his wife: a thermostat. She was baffled.  But she soon became a believer.

The Nest Learning Thermostat

Turns out, the thermostat that most people have in their house is essentially the same thermostat that people have been using for 30 years or more. Some have touchscreens or other innovations, but they are still stand-alone boxes that pretty much do one thing. Even programmable thermostats aren’t an improvement, because studies have shown that most people don’t ever learn the complicated steps to program the thermostat, or they are unhappy with its performance, so they simply place it in permanent “hold” setting—which means they are essentially using it as an analog, non-programmable thermostat.

Realizing that most of a household’s wasted energy is controlled by the thermostat, Tony Fadell thought that he could cut down on energy waste (and its concurrent pollution) by developing a thermostat that trains itself. The Nest is the outgrowth of that project. It is a thermostat that learns from you each time you turn the thermostat up or down. It recalls the time of day and the temperature setting, and it eventually learns your routine and begins to adjust itself automatically. It contains a motion sensor, so if it senses no motion for several hours, it assumes you are away from home and changes its settings to “away” mode, which means it adjusts itself to a more energy-efficient temperature—higher in the summer, lower in the winter.  It also senses when you are approaching at night and lights up for you.

But what if you don’t want your thermostat to adjust itself? What if you have a dog or cat that might prevent your thermostat from going into “away” mode? Well, the beauty of Nest is that it comes with an online account that allows you to set very specific temperature minimums and maximums, as well as setting specific times for any adjustments (these minimums and maximums will also make sure Nest keeps your pets comfortable while you’re away). It also allows you to set your account to permanent “away” mode if you go on vacation. And it does this by interacting with your computer wirelessly. As long as you have wireless internet access, the Nest can be controlled from your computer, or even via your iPhone. If you are coming home early in the middle of winter, you can pull up the app and tell it to start heating the house up before you arrive. If your family has a cabin in upstate Wisconsin and you are heading up for the weekend, you can tell Nest to make the cabin warm before you get there. So, not only is the thing energy efficient, it is also incredibly user friendly. It also trains you…when you make an adjustment that is going to save you energy, a little green leaf pops up as a sort of reward—like getting a gold star!  I can’t wait to get mine installed and try it out. It really does seem like this is something—one of the first real things—from “the house of the future.”

If you want to learn more, you can see their very nicely designed website at Nest.com.