Tag Archives: Primal Recipes

Primal Chili Pork Verde: Mexican Pork Stew with Green Chiles

This is one of my favorite Primal Recipes, one which is very simple to make. It is easy to assemble and cook, requiring nothing more difficult than chopping some vegetables and meat. It does require a pressure cooker for the method I recommend, but you can do the same thing with long, slow simmering, but plan on the recipe taking about four hours rather than the one hour required in a pressure cooker. Also please note that the heat factor of this recipe is pretty mild despite the presence of several kinds of chile peppers, but I offer some ways you can boost the heat at the end of the recipe if you so desire.

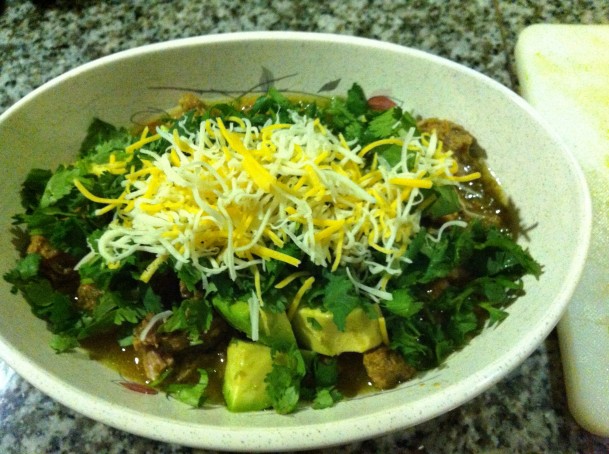
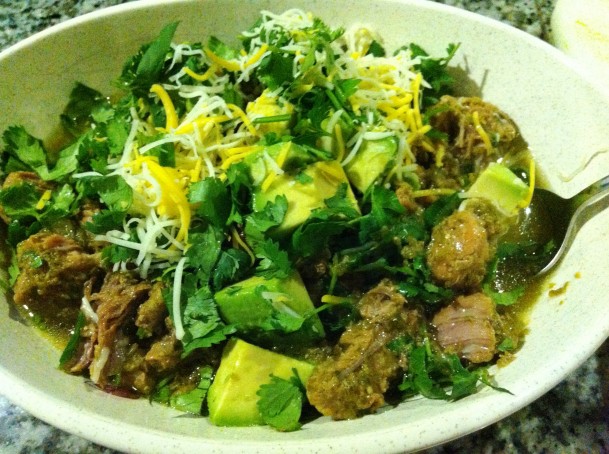
Primal Chile Pork Verde, Ready to Eat

Primal Chili Pork Verde Recipe

Ingredients:

Pork (I often use a pork butt roast), about 3-4 pounds

3 Poblano Chile Peppers

3 Jalapeno Peppers

3 Serrano Peppers (or 3 more Jalapenos if you can’t find Serranos)

½ pound Tomatillos

1 Onion, minced or diced

5 or 6 cloves of garlic, minced or put through a garlic press

Salt & Pepper to taste

Lime juice from 2 fresh limes

Toppings:

Chopped Cilantro

Diced Avocado

Shredded Cheese (I use a pre-shredded Mexican Cheese blend)


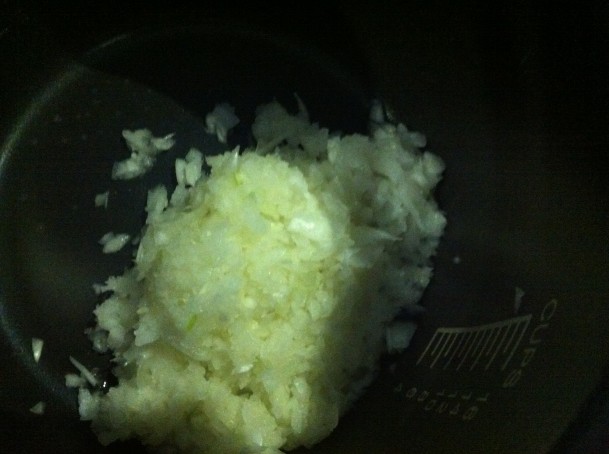
To begin with, you need to chop or mince the onion. Since the later part of the recipe requires using the food processor, I just toss the onion in and give it several fast pulses until it is broken down into small pieces. Then transfer the onion to the pressure cooker vessel.

Minced Onions

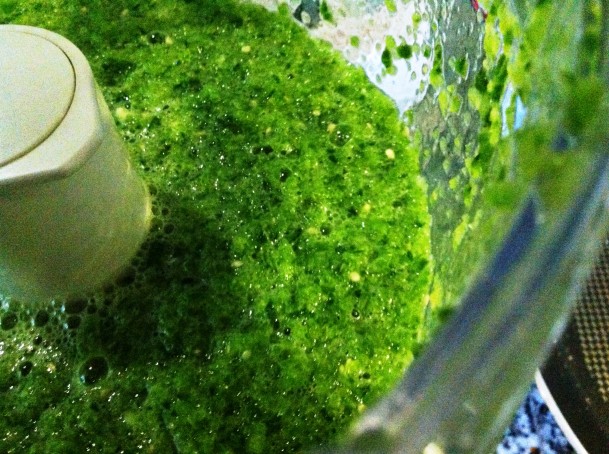
Next, clean and seed the peppers. Discard the seeds and add the flesh of the peppers to the food processor fitted with the blade attachment. Chop the tomatillos in half and add them to the food processor. Add one cup of water and turn the processor on. Process until the peppers are fully broken down and partially liquefied, about one or two minutes.  (You may add more peppers if you choose; the recipe as designed is actually not very spicy, but you can add more jalapenos either now or at the end if you prefer it spicier).

Transfer the pepper mixture to the pressure cooker.

Pureed Chiles for Chile Pork Verde

Now you need to break down your pork meat into stew sized pieces. I often start with a whole pork butt roast, and then chop it into pieces about ¾ inch cubed, but you can make the pieces smaller or larger, depending on your preference. I am careful to discard any tough or fibrous or gristly pieces I come across. In Texas, we have a store called HEB that sells cryovac packages of pork meat labeled “Carnitas”, and I often use that meat (which comes in multiple large chunks) instead of the pork butt because it is cheaper and similar in quality. Feel free to use any cheap cut of pork, because the length of cooking in the pressure cooker will tenderize almost any cut of meat, but be careful not to pick a piece that is too lean, and make sure when you are picking out the tough parts that you don’t discard too much fat. This dish requires some fat to make it rich and flavorful.

Add your pork to the pressure cooker vessel. Then add your minced garlic. Add salt and pepper to taste (and don’t be shy with the salt—remember that it needs to flavor three or four pounds of meat)! Squeeze in the juice of one lime. Give everything a good stir and then place the vessel in the pressure cooker. Set the cooker on ‘High’ and cook for 55 minutes.

Meat and Chiles Ready to Go Into Pressure Cooker

After the meat is done cooking, you will want to carefully release the pressure and then give everything a good stir (the meat tends to stick together in the center of the pot during cooking, but it breaks apart easily).  Let the meat cool for a few minutes as you assemble the toppings.

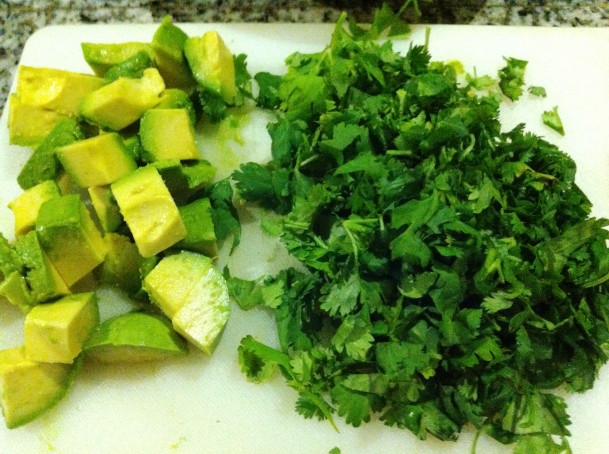
I choose to use diced avocado and chopped cilantro as the toppings for my primal chili pork verde, but you can use whatever you want. Many families will traditionally serve this green pork stew over rice or over tortilla chips (corn chips), so if I’m making this for a crowd, I will often offer that on the side (and simply skip it myself). I also put shredded cheese on top of mine. I know a few people who like to add a dollop of sour cream, and it sounds good as I write it, so I think I will try that next time! One thing to note: cilantro can taste kind of ‘off’ or soapy if it sits around for a long time after being chopped, so I usually chop it at the very last minute.

Diced Avocado and Chopped Cilantro, Toppings for Chili Pork Verde

Just before serving, stir in the juice of one more lime to give the dish a bit of brightness. Feel free to add some finely minced peppers at this point, too, if you prefer it on the spicy side—the long cooking mellows out the heat of the cooked peppers, so adding some at the end is an easy way to boost the heat. You can even offer the minced peppers on the side so your guests can doctor their stew to their own desired heat level.

Primal Chili Pork Verde with Toppings

This dish is great as leftovers, and it reheats beautifully, but the avocado and cilantro don’t hold so well, so I will usually chop some fresh toppings to go with the leftovers on the day I am serving them. This recipe is so good that it makes me glad that I follow the Primal Blueprint method rather than trying to figure out how to make a Paleo friendly pork stew recipe, because how could you possibly make this without using any chile peppers? I simply couldn’t give up healthy, flavorful, and nutritious peppers!
Double Cream Recipe: How to Make Double Cream…or Can You Just Substitute Heavy Cream?

The British love cream in all its varieties, from clotted cream to double cream to Devonshire cream (or Devon cream), to Cornish clotted cream and many other varieties. It’s enough to make your head spin, and it’s particularly confusing if you’re an American trying to follow a British recipe. I recently ran into this problem when I was trying to make a delicious-looking and –sounding lemon tart that was featured on an episode of “How to Cook Like Heston” with Heston Blumenthal. It called for double cream, which sent me on a quest to figure out: can I just substitute heavy whipping cream for double cream? The answer is no. But I have found a solution…

A Cream Maker.

I actually started looking into this gadget several years ago, but never bought one because they were mostly offered on the UK version of eBay, and the shipping was prohibitively expensive. This is a simple, old-fashioned gadget that does its one job perfectly, and that job is to make double cream (or single cream or extra thick double cream or any of the other varieties of cream) out of plain old milk and unsalted butter. Basically, it re-homogenizes the fat into the milk. It came into popular use during World War II, when rationing led to cream becoming almost impossible to find. People could get their standard ration of milk and butter, but no cream. Since butter is nothing but milk fat that has been separated from the liquid portion of the milk, it stands to reason that putting the butter back into the milk would reconstitute the cream, but the process is tricky. You can’t just stir it together, because the melted butter floats. You can’t shake it together, because that is actually how the butter is created in the first place—shaking only forces the sticky butter to cling together. What you can do is force the liquid butter and milk through a fine nozzle a bit at a time under pressure, and this will recreate the original cream.

I finally found an old Bel Cream Maker on eBay in the US, and it looked completely unused. I was excited to give it a whirl when it arrived in the mail today. I washed and assembled the parts, and followed the directions in the accompanying original brochure, and I soon had extremely thick double cream! I document the recipe and procedure below.

If you want to buy one of these gadgets for your own use, here are some tips: they were most commonly made by a company called Bel. You can also find an attachment for a Kenwood mixer that does the same things, but that’s only helpful for people who have such a mixer. Anybody can use one of the Bel cream makers. When searching on eBay, you find a wide range of conditions and prices. These usually go for around $10 to $20 US, but I’ve seen sellers who think they can get $50 to $300 for them just because they are cute and vintage. I can assure you there is no need to pay that much! Several of these come up for sale each week, so just be patient and check back and you’re bound to be rewarded.

You will find many more “ice cream makers” than cream makers, so it’s best to find a way to filter those out. One of the Bel models was called the Jubilee, and many of the older models are made of Bakelite, so the best search I found was the following (leave all punctuation and spacing intact):

(bel,jubilee,Bakelite) “cream maker”

What this search is telling eBay, just in case you don’t know how eBay advanced search works, is: show me any items that have any of the words bel, jubilee, or Bakelite AND the words “cream maker” in exactly that order. In essence, this gets rid of the glut of whipped cream makers and ice cream makers so you don’t have to wade through them. Now on to the Recipe (*see note at the end regarding different measurements or percentages of butterfat–one of my helpful readers actually created a calculator that I will link to)!

Double Cream Recipe:

Double Cream is 48% milkfat. The highest percentage milkfat available in the US is typically 36%, so it doesn’t substitute. Once you have your cream maker in hand and assembled and ready to go, follow these steps:

Weigh or measure out:

4 fluid ounces of milk (100 ml)

5 ounces of UNSALTED butter (you don’t want salty cream, do you?) (140g), cut in pieces

Put these two ingredients together in a small saucepan and heat gently over low to medium heat. You do not want to boil or scorch your milk because it will change the flavor. If you keep the temperature below 180 degrees F, that is best. You can remove it from the heat once the butter is about halfway melted and the residual heat will continue melting it. Once it has been completely melted, stir it and then quickly pour it into your cream maker. Next, hold the maker FIRMLY with one hand (you need to pump the handle of the thing up and down with some force, so you will need to keep a firm grip on the base of the thing to prevent any spills). Pump the handle. If nothing is coming through into the chamber below after a few pumps, stop pumping, carefully take off the lid from the base, and adjust the nozzle nut by loosening it slightly. Reassemble and start over. Once you see something coming through (you should probably see about ½ teaspoon of cream being created with each pump), continue pumping until all of the milk and cream have been forced through into the lower chamber of the cream maker. Congratulations! You just made Double Cream!

Here are some photos I took while I was making my first batch, along with some photos of the resulting THICK cream (it became much thicker after cooling):

The box my Bel Cream Maker came in (mine seems to be from around the 1970’s, which is around the time the company stopped making this item, it seems, judging from availability).Bel Cream Maker

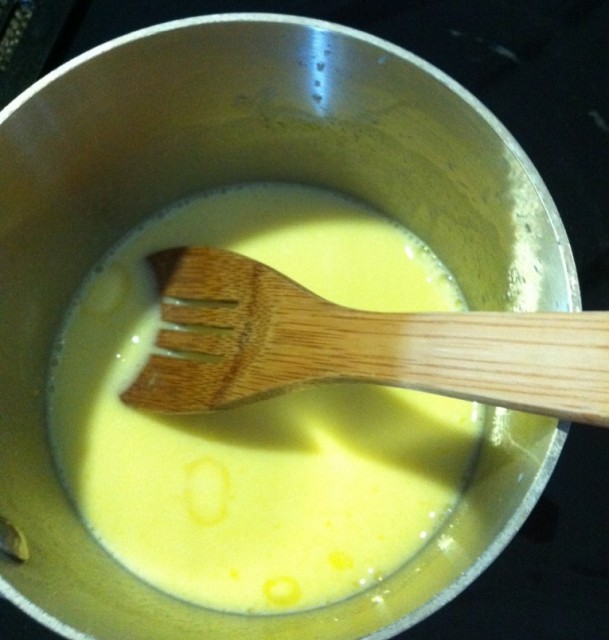
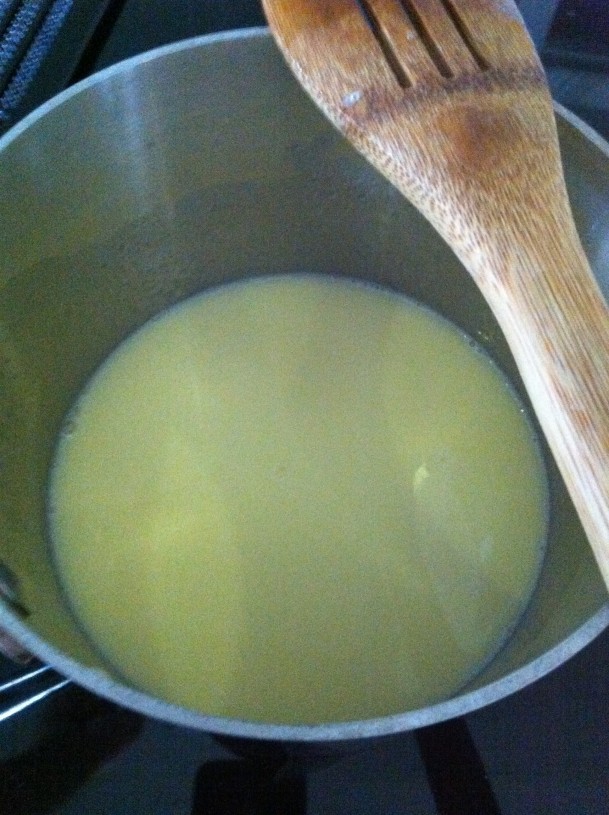
Melting the butter.  After heating it up and removing if from the heat, you can let it sit for a few minutes.  You can see some of the remaining small pieces of butter sitting in little yellow pools of melted butter. Once you stop seeing those little pools of melted butter appear, your butter is ready to go.Melting Butter for the Bel Cream Maker

All melted, no more pools of yellow butter on top:Melted Butter

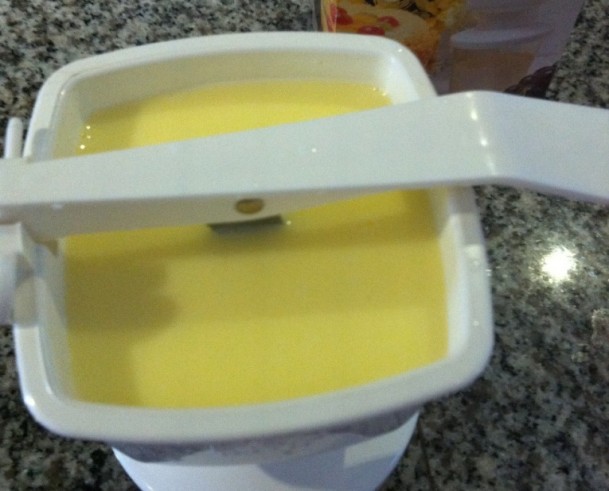
Poured into the Bel Cream Maker:Butter Poured into the Bel Cream Maker

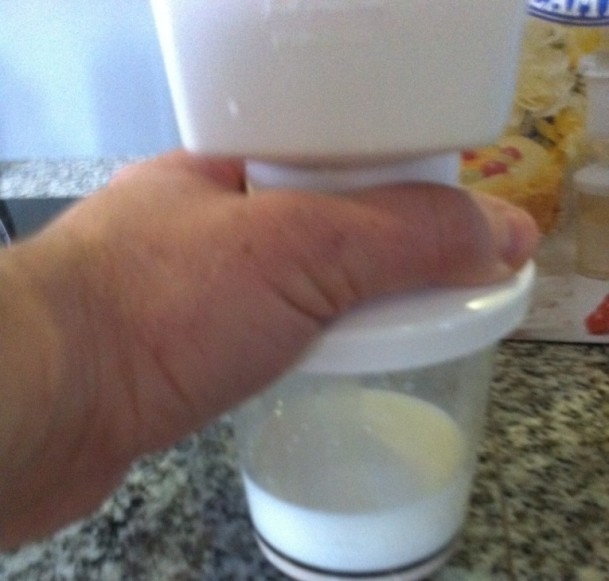
The first bit of cream:Bel Cream Maker Making Cream

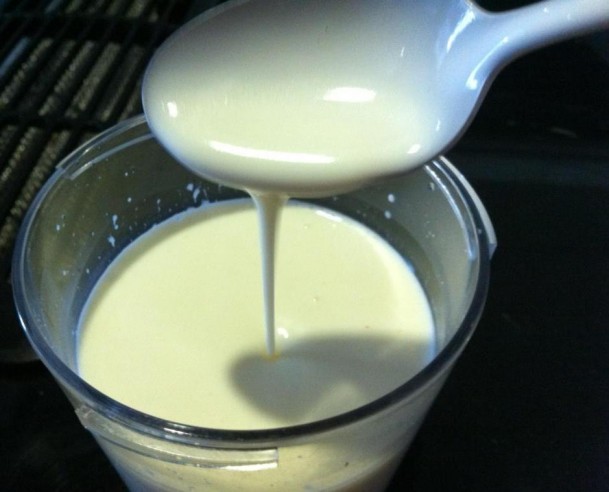
All done. The final product. This cream is about twice as thick as American Heavy Cream. I can’t wait to try the Heston Blumenthal Lemon Tart recipe (it appeared on Episode 2 of “How to Cook Like Heston”, the “Eggs” episode). One commenter pointed out that the cream looks a little thin. Please remember that it was still warm in this photo, and it thickened considerably after being chilled.Glorious, Thick Double Cream Made with Bel Cream Maker

Of course, the tart recipe is not one of my normal Primal Recipes.  It’s one of my “cheat day” recipes.  I plan to use the eggs from my amazing French Marans hens to make this incredibly rich looking custard tart.  Can’t wait to try it.  If it’s as good as I hope, I’ll share the recipe.

*Note on measurements and percentages of butterfat: I have had many questions from readers regarding different percentages of butterfat, or what they could subsitute to come up with the preferred 48% of double cream. One of my readers, Matt, actually made a calculator that will help you with any such questions! You can find it here. It will open up pre-populated with 80% butterfat (the percentage in plain butter) and 3.25% fat (for whole milk). If you are using this calculator, you will want to leave the 80% for butter, but you could change the milk fat percent to 12% for half-and-half, or 0% for skim milk, 1% for 1% milk, etc. You can even change the desired volume, depending on how much double cream you need. Very handy! Thanks, Matt, whoever you are!

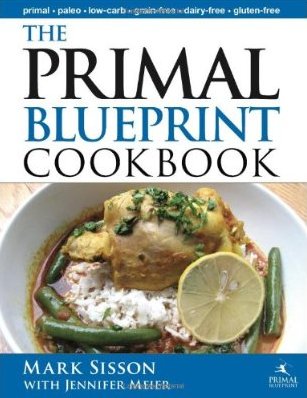
My Favorite Recipe from The Primal Blueprint Cookbook: Cabbage and Sausage!

It may strike you as funny or a bit odd that I would say this was my favorite recipe from the excellent The Primal Blueprint Cookbook by Mark Sisson and Jennifer Meier.  It would have struck me as pretty funny about nine months ago, too.  I grew up in a family that simply didn’t eat cabbage.  I knew people who did, and I remember jokes from my childhood about how boiled cabbage smells (it can smell sulphurous, a bit like a rotten egg), but nobody in my family ever cooked it, on either side, from my great grandparents on down.  It just wasn’t part of our diet.Primal Blueprint Cookbook

I’d always assumed that my family avoided cabbage because it was simply no good.  I remember having it at a friend’s house when I was young, and it was terrible—her mother had boiled it to mush.

That’s why this recipe was such a revelation to me!  It is so simple that I thought it was kind of a throw-away, just something added because they were trying to meet a minimum recipe quota.  Still, the simplicity of the recipe (it only has four ingredients) appealed to me, so I gave it a try, and it’s now one of my regular recipes.  I’m so glad cool weather has finally come back to Austin so that I can turn my oven on and make cabbage and sausage again!

This could be called a two ingredient recipe, since the only two required ingredients are cabbage and sausage.  The other ingredients are optional.  They are butter and salt.  If you want a more Paleo friendly recipe, you could leave out the butter and go with a lowfat sausage, but I prefer mine primal—I add dabs of butter all over the top!  I do go for an excellent sausage, though.  I’ve tried making it with pork Andouille, and I liked it a lot, but my favorite sausage for this recipe is one that I get at Whole Foods.  It’s called Pederson’s Sweet German Sausage, and it tastes great!  It’s lightly smoked, and, despite being called “sweet”, it has less than one gram of carbohydrates per serving, so it’s a low carb sausage as well (I should point out here that my boyfriend Michael prefers the Pederson’s Smoked Jalapeno sausage, so we usually go back and forth between that one and the Sweet German for the sake of variety).

It turns out that I love cabbage, which is great, because cabbage is full of nutrition.  And when cooked this way (roasted in the oven), it doesn’t give off that stinky sulfur smell.  The recipe takes me between 45 minutes and an hour to finish, but the actual work time is truly only about five minutes, so most of the time is simply spent waiting for the oven to do its job.  Here’s my version of the recipe, which might vary slightly from the book version.

Primal Cabbage and Sausage Recipe

  • 1 Head of Cabbage (I prefer a cabbage that is on the “looser” side—not quite so densely packed—so if it feels like a bowling ball, choose a different one)
  • 1 sausage, approximately 12 ounces to 1 pound in weight—I go for fully cooked sausages only for this recipe
  • Salt to taste (varies depending on the sausage you choose)
  • Butter—about 4 tablespoons, cut into pats

Preheat your oven to 350 degrees Fahrenheit.

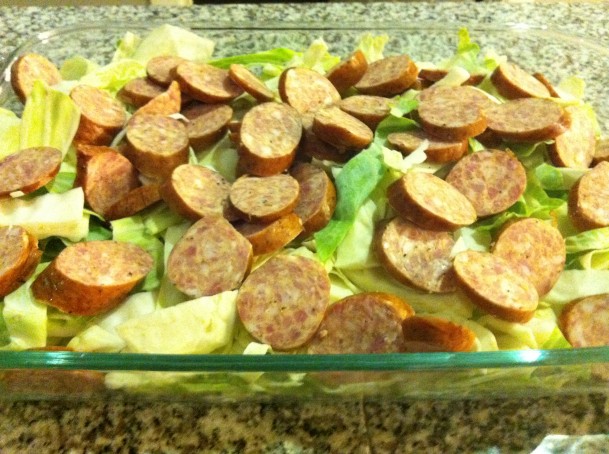
cabbage and sausage

To assemble the dish, cut the cabbage in half by bisecting it through the core, so that it comes apart into two halves.  This will allow you to see how deeply the hard core runs.  Take a paring knife and cut away the core and discard (I save this and give it to my backyard hens).  Next, take a large chef’s knife and cut each cabbage half into strips about ½ inch to ¾ inch wide.  Chop the other half in the same way.

Take a large baking dish such as a 9 x 13 inch Pyrex dish and butter the bottom and sides.  Add the chopped cabbage to the dish.  Sprinkle it with salt.

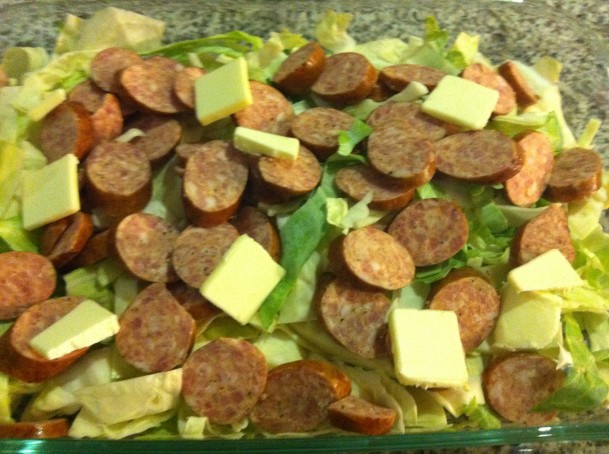
Next, chop your sausage into rounds about ½ inch thick.  You can do this on the bias or straight through the length, depending on your preference.  Sprinkle the sausage over the top of the cabbage.  Sprinkle the butter (if using) evenly over the top of everything else.  Cover tightly with aluminum foil and place the dish in the oven and cook for 40 minutes.

cabbage and sausage with butter

After 40 minutes, remove the foil carefully by lifting it away from you, so the escaping steam doesn’t burn you.  Discard the foil.  Toss the cabbage and sausage with some tongs.  Put it back in the oven, uncovered, for 10 more minutes.

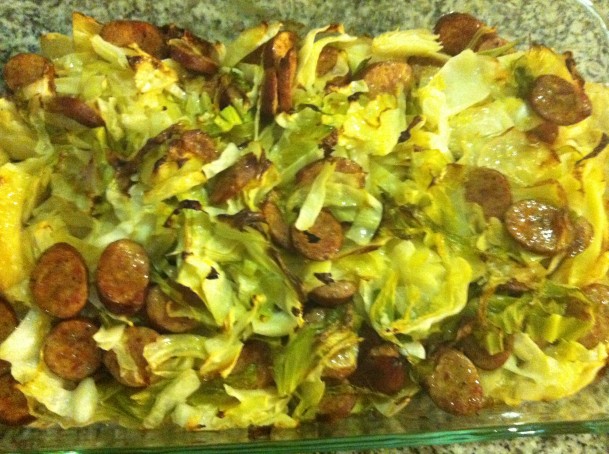
This next step requires you to use your judgment.  When the 10 minutes has passed, take a look at the dish and see if it looks done.  Some cabbages are more watery, so if it’s too watery you can put it back in the oven for another 10 minutes.  If it looks done to you, it’s good to go.  Whether you want to cook it more at this point is truly a matter of preference.  If you want the cabbage to be very soft, you can continue cooking it.  If you prefer it with a bit of crunch, you can stop cooking as soon as it looks done.  I have tried it all different ways, and I prefer it somewhere in the middle—I like it cooked all the way through so it is soft, but not to the point where it starts to become browned.

cabbage and sausage cooked

Once it’s done to your satisfaction, toss it again and serve!

I hope you enjoy this recipe as much as I do.  If you are starting out on the Primal Method, then I think The Primal Blueprint Cookbook is a must-have.  It is filled with simple and delicious recipes like this one.

Sous Vide Cooking at Home with the SousVide Supreme Waterbath Oven

Sous Vide cooking has become all the rage in the foodie world for one simple reason: it works! Using the sous-vide method, you can cook your food to a very specific temperature, so you know it will never overcook.

Most people think sous vide means to cook in a waterbath, but the literal translation is “under vacuum.” This is because you can’t simply throw a nice Porterhouse steak into a vat of warm water—you have to seal it first. This is usually done by using one of those vacuum sealers that are meant for sealing food for long term storage (they work by sucking all the air out and then heat sealing the plastic bag). After the food has been sealed this way, you can slide it into the water without worry (I use and recommend the FoodSaver Sealer–their bags are BPA free).

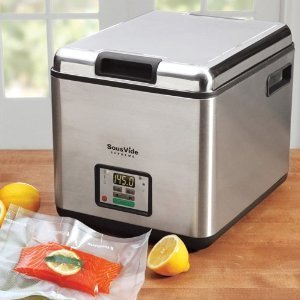
So how does it work? It’s basic science, plus a piece of sophisticated equipment. You need a machine that will heat water to a very specific temperature and then hold it at that temperature without fluctuating. Prior to the release of the SousVide Supreme, there was no home-friendly device that could do this. People resorted to buying huge vats and then attaching giant water bath heaters and circulators (to make sure the water in the entire vat was held at the same temperature, and not only the water near the heater). It could cost well over a thousand dollars for this setup, not to mention it took up a lot of space and was unattractive, so this type of cooking used to be pretty much limited to molecular gastronomy restaurants like El Bulli or Chicago’s Alinea.SousVide Supreme Water Oven

The SousVide Supreme Oven, however, is an attractive appliance that sits on your kitchen countertop. It is designed to hold your water at a very precise temperature, without fluctuating more than one degree Fahrenheit higher or lower. What this means is that, if you know you like your steaks medium rare, and the perfect temperature for a medium rare steak is around 135 internal temperature, you set the bath to that temp, let it heat up, seal your steaks in a vacuum sealer bag, and then slip them into the water. Then, you just have to let them come up to that temperature all the way through. The time required depends on the thickness of the steak, but the beauty of this setup is that after the steak is done, you can let it just keep sitting there—it will never get any hotter! Your Sous Vide Supreme will hold your steak at a perfect degree of doneness for as long as you want it to! The temperature is high enough that it will prevent any bacterial growth, so there’s no need to worry about food safety—your steak has basically been Pasteurized after it’s held at that temperature for several hours (this is the same way they Pasteurize raw eggs for sale at the grocery store). When you get home, you simply need to slice the bag open, take out your steak, dry it off with paper towels, and sear it.

The searing step is an important one. While the steak is technically fully cooked and could be eaten as-is, it will LOOK unappetizing, since we are used to seeing meats that have been browned in an oven or by being seared in a pan or over a grill. So we just need to cook the outside of this steak to match our expectations of what a steak should look like. There are several ways you could do the sear. Many people prefer a butane cooking torch like the ones chefs use to melt sugar on top of crème brulees (or is that crèmes brulee? I never took French)!  My preference, though, is to simply heat up a cast iron skillet, add some clarified butter, and drop the steak in and sear it completely on both sides. This only takes about a minute or less per side—you aren’t trying to cook the steak, remember—it’s already cooked inside. Just sear it long enough to cook the outside and give it some nice browning. This not only makes the steak look the way we want it to, the Maillard reaction (which is basically browning due to caramelization) also adds the flavor of the sear that we expect when we get a delicious steak.
I tried both the torch method and the cast iron skillet method, and I have to say that I prefer the skillet. When I used the torch, I could taste the flavor of the fuel on the steak. Most people say they can’t taste it at all, but I definitely tasted it. Which is fine with me—now I have a great skillet that can be used for other things, and I don’t have to worry about buying refills for the culinary torch.

So, is the SousVide waterbath worth it? In my opinion, definitely yes. It does take some getting used to (and it took my boyfriend even longer to get over his skepticism), but sous vide cooking really is a useful tool to have in your culinary repertoire. It’s not that I cook this way every night—chicken is a staple at my house, and it would be hard to make an appealing chicken dish in the sous vide cooker—at least I haven’t found any recipes that appeal to me (if you have, please let me know below, because I’d be interested to try some). But for beef, the Sous Vide is now my favorite method. Especially since I don’t have an unlimited budget, and we often go for what’s on sale; the sous vide method can work wonders on cheap or tough cuts of meat—one of our favorites is 48 hour spare ribs. You read that right—we cook spare ribs for 48 hours. When meats are held at that temperature, enzymatic action speeds up, and after two days of being held at the perfect temperature, a tough cut of meat is turned into a delicious, tender, shockingly good dish.

Whether you are interested in this appliance for yourself, or whether you’re looking for a great gift for a foodie, this oven just might turn out to be not only a useful tool, but a fun plaything.  Like a Kenner Easy-Bake Oven for adults!

Additonal notes:

Please realize that this method requires a high-quality vacuum sealer that seals by heat; it won’t work with one of those cheaper Ziploc type pump bags–they are almost guaranteed to leak if left in a water bath for several hours.

Jalapeno & Cilantro Primal Pesto with Chicken and Spaghetti Squash (Also Great with Pasta)!

If you are like me and you share meals with somebody who isn’t totally following the Primal method or Paleo diet, this Primal pesto recipe is great, because it is so easy to divide the sauce, and the recipe is also low carb diet friendly, as well as wheat free and gluten free, and it can easily be made dairy free by simply omitting the parmesan—there is so much flavor from the cilantro and jalapeno that you probably won’t even miss it. You can have your portion over spaghetti squash, while the other people in the house can have theirs over pasta, if they wish. It is also a great way to use up any leftover chicken. And there is nothing sacrificed in this dish—it’s pretty much exactly the same recipe I used before I decided to go primal. I came up with this recipe after trying the Jalapeno Pecan Pesto with Cilantro that is sold in the olive bar at my local Whole Foods. It was delicious! With just a few trials, I managed to come up with a recipe that I think is even better! It’s also better than any recipe I’ve found in any cookbook.

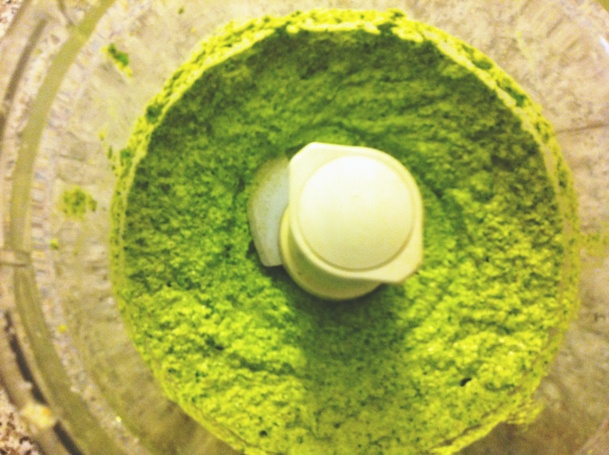
Jalapeno Cilantro Primal Pesto

Jalapeno Cilantro Primal Pesto in Food Processor

One of the reasons I actually prefer this dish to “normal” pesto (made with pine nuts and basil) is that it is so much cheaper. Even the Italians don’t always use pine nuts (or pignoli) because they are so expensive. It is common to substitute almonds or walnuts, and both will work wonderfully with this dish. I choose to use walnuts because I can buy a huge bag of high quality walnuts at Costco, and because walnuts are high in omega-3 fatty acids and ellagic acid (and they taste great). Walnuts are actually the only nuts that contain omega 3s in any substantial amount, although there are trace amounts in nuts like cashews and brazil nuts. You can give your meal an even bigger boost of omega 3s by opting to mix the pesto with walnut oil instead of olive oil. The fact that this oil is consumed raw only adds to its health benefits.

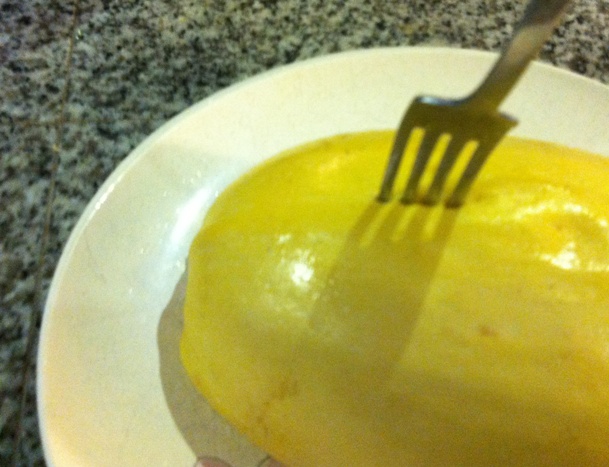
spaghetti squash cooked

Squash should be easily pierced with a fork when done

One note before we begin: the leftovers from this recipe do not keep as well as most. The raw freshness of the cilantro and peppers is changed when the dish is reheated, unless it is heated very slowly and carefully (heating it too hot will cook the pesto, and will make it taste completely different, and not as fresh). This will make enough for 4 people. If you are making the dish for one, it would probably be best to halve the recipe so that you don’t have a lot of leftovers; it is so simple to throw together another batch of the pesto that I’d just wrap the second half of the spaghetti squash in plastic and keep it in the refrigerator, and whip up another batch of jalapeno pesto a few days later. The following directions do not include cooking the pasta, so, if you intend to do so, just be sure you time it so that the pasta will be done by the time your spaghetti squash is done

Primal Recipe for Jalapeno Cilantro Pesto with Spaghetti Squash and Chicken

1 medium spaghetti squash

2 large chicken breasts or 4 boneless, skinless chicken thighs

2 bunches of cilantro

2 or 3 jalapenos (to taste); other peppers like serranos can be substituted for a change of pace

5 or 6 garlic cloves

1 tablespoon table salt

¼ cup of olive oil or walnut oil

¾ cup of raw walnuts

Lime juice to taste (1/2 to 1 lime)

½ cup ground parmesan cheese (optional, will taste fine without, but may need additional salt)

Directions:

To begin, cut the spaghetti squash in half lengthwise (from the stem through to the opposite end). Be very careful when doing this, because this is a very hard type of squash, and it requires a lot of force to cut through. If you aren’t careful, it is very easy to slip and injure yourself. I find it easiest to cut this type of squash by using a large chef’s knife such as the Forschner Fibrox 8 Inch Chef’s Knife (the most useful knife in my kitchen—if you don’t have a large chef’s knife, you owe it to yourself to get one; they’re only about $25 at Amazon). Start by securing the squash by laying it on a folded towel on your countertop or cutting board. Then, pierce the side of the squash by driving the tip of the knife straight down into the flesh until it is embedded. Carefully but firmly force the knife to cut slowly through the squash, turning the squash as necessary to make sure that you are always cutting downward toward the cutting board. Once it is cut in half, scoop out the seeds and membranes and discard.

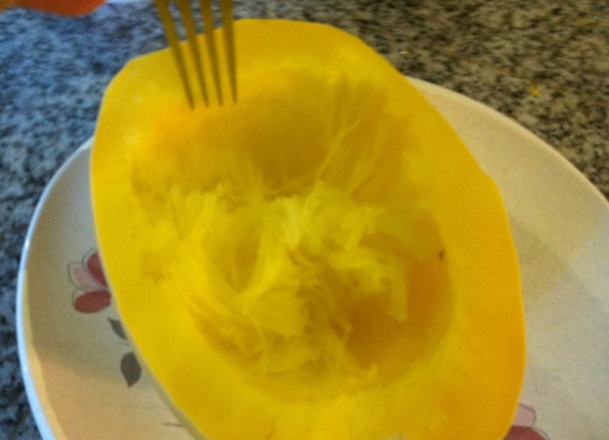
spaghetti squash being shredded

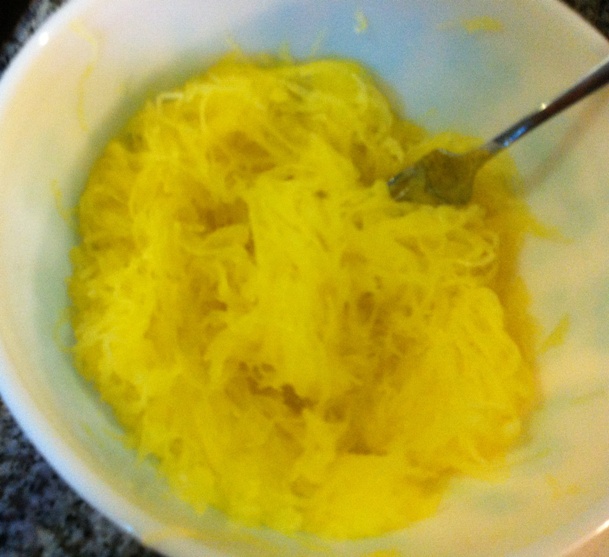
Use a fork to "shred" the squash, which should come apart easily

Add about ½ cup of water to a microwave-proof pie plate such as a Pyrex plate (if you don’t have one, a bowl will also work). Place one half of the squash cut side down into the plate. The cut edge should be in the water or just above it. Cover the plate and squash with plastic wrap and place in the microwave and cook on HIGH for 12 or 13 minutes.

While the squash is cooking, you can get started on the chicken. If you have leftover chicken, simply cut or tear it into bite-size pieces. If you are starting with fresh chicken, you have a choice to make. You can cook it however you prefer. I used to use a George Foreman grill, and then let it rest for a few minutes and chop it up, but I no longer have that type of grill, so now I cut the raw chicken into bite size pieces and give it a quick sauté. I will leave this step up to you…cook your chicken however you prefer, but make sure that it is thoroughly cooked. Set it aside to rest while you assemble the pesto.

spaghetti squash in bowl

Squash in the serving bowl--no need to oil or moisten, because it's not starchy

To put together the actual pesto, simply put the rest of your ingredients in your food processor with the blade attachment. Add the two bunches of cilantro, stems and all (you may wish to pick off any dead leaves and cut a short length from the bottom of the stems, but the stems are full of flavor, so retain as much as possible). Press the garlic through a garlic press and into the bowl with the cilantro (or simply toss in the cloves if you prefer a chunkier texture). Stem and seed the peppers (discarding the seeds and membranes) and add the peppers. Add all of the remaining ingredients to the bowl. Place the lid on the food processor and turn it on. You can choose to run it for only twenty seconds or so if you prefer a chunkier texture, but I prefer to run it for at least a full minute to make a very smooth pesto. If the cilantro is not mixing properly, you can stop and scrape down the bowl and go again. You can also add a bit more oil if it seems to need more liquid in order to blend properly.

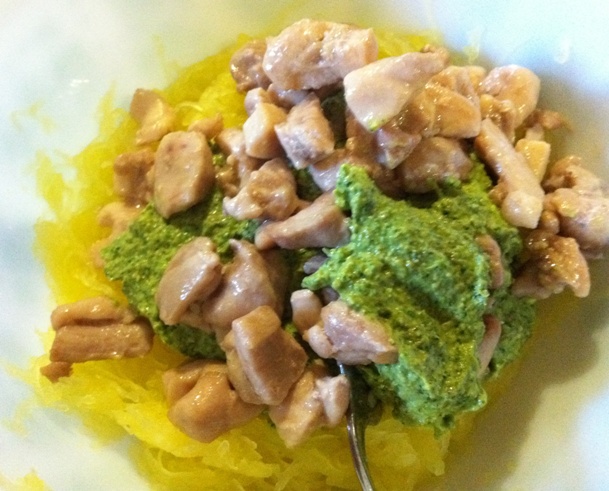
Primal pesto being tossed together

Primal chicken pesto in the serving bowl, ready to be tossed together

When the spaghetti squash is done, (it should be easy to pierce the top side with a fork or knife; the skin is a bit leathery, but the flesh inside should be easy to pierce), slide that side out of the pie plate onto a dinner plate and set aside to cool for a bit. Add more water to the dish and cook the second half of the spaghetti squash as before (wrapped in plastic, microwaved on high for 12 or 13 minutes). After the first half has cooled for about 5 minutes, you can begin assembling the final dish. Turn the squash so the inside is facing up (using a hot pad if necessary) and use a fork to “shred” the squash apart into “noodles”. If you‘ve never done this before, it’s quite simple…just stick the tines of the fork a short depth into the flesh of the squash and pull toward the bottom of the squash. The strands will start to come apart quite easily and you will quickly have a mass of spaghetti strands in the shell of the squash. Dump these strands into a medium bowl that you will use to serve your Primal Pesto. Continue to shred the squash until all of the flesh has been shredded. In the end, you should have a very thin, tough shell, with only a few pieces of squash still stuck to the inside. You can discard the shell at this point.

If you are going to separate the pesto into two batches so that some of it can be used for a non-paleo or non-primal eater, set aside an appropriate portion of the pesto. Add the rest of the pesto to the spaghetti squash in the bowl. Divide the chicken similarly (setting aside some to go with the other portion of the pesto), and add the remaining chicken to the bowl. When the other half of the spaghetti squash has finished, shred it as before and add it to the bowl (you may let it cool for a few minutes if you wish in order to make it easier to handle). Stir, taste, adjust the seasoning, and serve!

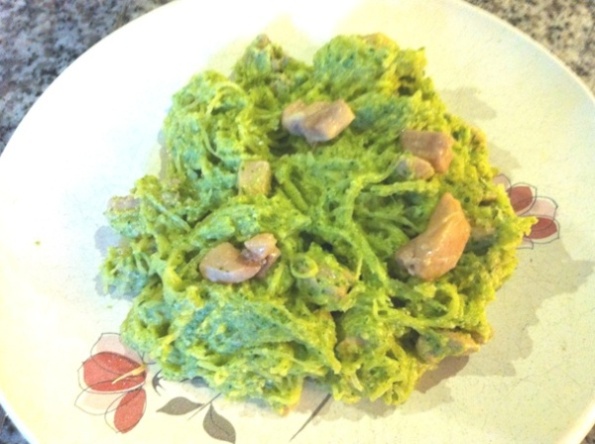
Jalapeno Cilantro Primal Pesto on a Plate

Jalapeno Cilantro Primal Pesto on a Plate

Just a few notes about the development of this paleo pesto sauce recipe: I wanted to see if I could boost the omega 3 essential fatty acids even more, so I decided to try substituting flax seed for the walnuts. Let me tell you, it was a mess! Flax seed can be ground into a meal, but if you try to grind them with a food processor, they suddenly release their oil–which is quite thick–and the whole thing turns into a giant ball of gum! I ended up with chunks of gummy pesto instead of a pesto sauce!  One tablespoon of salt may sound like a lot, but you have to keep in mind that this is a sauce, and the salt has to season the chicken and the “spaghetti” as well, so it really isn’t that much.  If you choose to leave out the parmesan, you may want to add even more salt.  During the time while you are waiting for the second half of the squash to cook, you don’t need to do anything special to the spaghetti squash (such as oiling it) to keep it from sticking together, as you would need to do with pasta; pasta is starchy and therefore tends to clump together, while this vegetable is low in starch (low starch=low carbs).

I have plans for more primal chicken and paleo chicken recipes, so stay tuned! I worked on my Primal Jambalaya Recipe last week and this week, and it needs only a few more tweaks before it’s ready.

Fast (Just Over 30 Minute) Primal Chicken Curry in a Skillet with Cauliflower and Sweet Potato

This is one of my favorite recipes, and it is a snap to make. Most of the cooking time is unattended, so I can easily browse the internet or do something else while the meal is cooking. It does have a fair bit of prep (chopping), but after that, it pretty much cooks itself with just an occasional stir.

Some Primal or Paleo dieters may not eat sweet potatoes, but I love them. They are nutrition powerhouses, and they lend this dish a subtle (and VERY pleasant) sweetness. However, this recipe is so easily adapted that you could double the amount of cauliflower and leave the sweet potatoes out altogether, or you could substitute an equal amount of many different vegetables, including turnips or butternut squash, or you could even try something like carrots or cabbage if you wanted. You can also make the dish hotter by using hot curry or more curry powder. Once you have the basic technique down, you will see how easy it is to modify this dish. For more notes on possible modifications and suggestions, keep reading after the recipe.

Primal/Paleo Skillet Chicken Curry

2 large chicken breasts (breast halves), sliced into bite-size medallions
2 tablespoons oil (vegetable or coconut), divided
1 large onion, diced
3 or 4 teaspoons Curry Powder (I use ½ hot and ½ sweet curry)
2 teaspoons table salt
8 cloves of garlic, crushed
1 ½ tablespoons fresh ginger, grated or chopped very fine
¾ cup chicken broth (optional—can be replaced by an equal amount of water)
½ head of cauliflower, chopped coarsely into bite-size pieces
3 or 4 medium sweet potatoes, about 1 ½ pounds, cut into bite size pieces
1 cup frozen green peas, thawed
1 small container (8 oz) whole milk yogurt (optional)
½ cup chopped cilantro

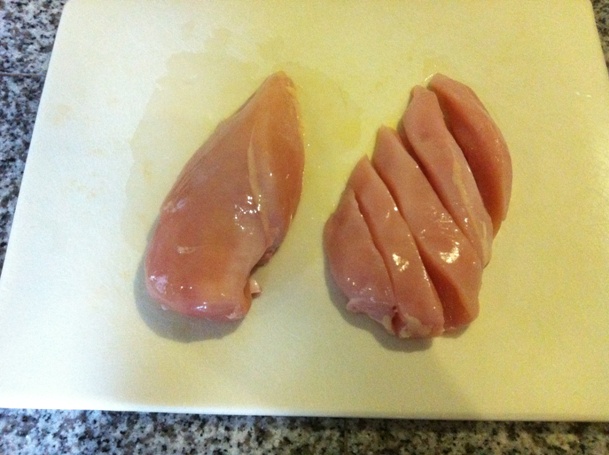
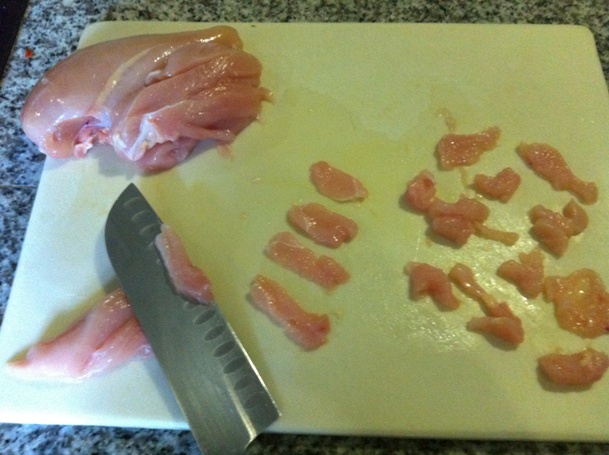
Chicken Breast Strips

To begin, slice your chicken breasts into strips about ¾ inch wide, and then slice each strip into small bite-size medallions. The size and shape are not important, since they will end up tossed into the final dish, so as long as they are small enough to fit onto a fork (and into a mouth!), all will be fine. I would also go ahead and chop the cauliflower into cubes about ¾ inch per side, but again, you are not looking for an exact dice, so a coarse chop is fine. Set the cauliflower aside. If you are fast at grating ginger and chopping garlic, you can wait and do that while the onions are cooking in step two in order to save time, but if you might be a bit slower at this task, go ahead and prepare those two things now and set them aside.

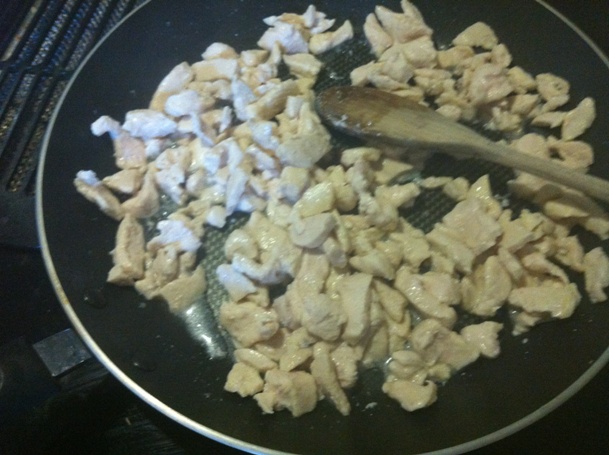
Add 1 tablespoon of the oil to a 12 inch nonstick skillet for which you have a tight fitting lid and put it on the burner over medium-high heat and let it heat up for a few minutes. When it is hot, add the chicken all at once. You will want to stir the chicken every few minutes and continue cooking it until it is done (no pink at all), but we are not looking to brown the chicken here—just cook it through. Meanwhile, while the chicken is cooking, you can quickly chop the onion and measure out the curry and salt (the curry & salt will be added at the same time, so they can be portioned into the same small bowl).

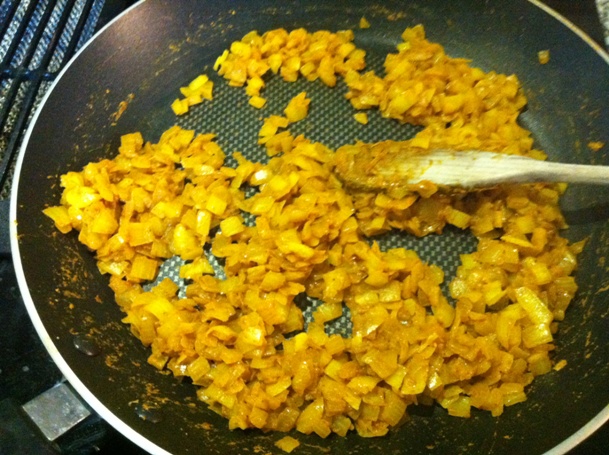
When the chicken is done, dump the contents of the skillet onto a plate and set aside (the chicken will be added back at the end). Add the additional one tablespoon of oil to the skillet and add the onions immediately, since the skillet should still be hot from cooking the chicken. Add the curry powder and salt and stir to combine. The onions should cook for about 5 or 8 minutes over medium-high heat (you can adjust the flame up or down as needed), stirring occasionally. While the onions are cooking, go ahead and grate your ginger and chop the garlic if you haven’t done so already. Also measure out your liquid (chicken broth or water). I recommend that you also peel the sweet potatoes and chop them at the last minute to avoid any discoloration.  The onions will be done when they are completely wilted and translucent, and the curry has started to become sticky, so that the onions begin clumping together. Quickly stir in the ginger and garlic and sauté for about 1 minute. Don’t cook too long at this point or the garlic will become bitter.

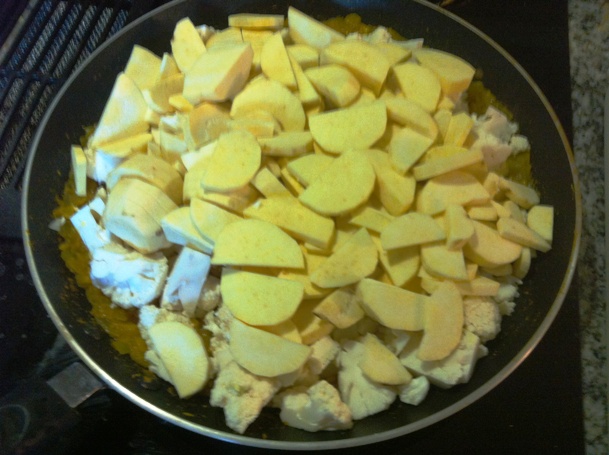
Add the chicken broth (or water—but this is Primal CHICKEN Curry, so go with the broth if you can) and stir to loosen any curry that has become stuck around the edges of the pan. You should have something that looks like a loose onion gravy in the bottom of the pan. Add your cauliflower and sweet potatoes, swirl the pan briefly (no need to stir at this point), and cover the pan tightly. Reduce the heat to medium or medium low. Set a timer for 10 minutes and let the vegetables steam undisturbed for that length of time.Primal Chicken Curry in Skillet

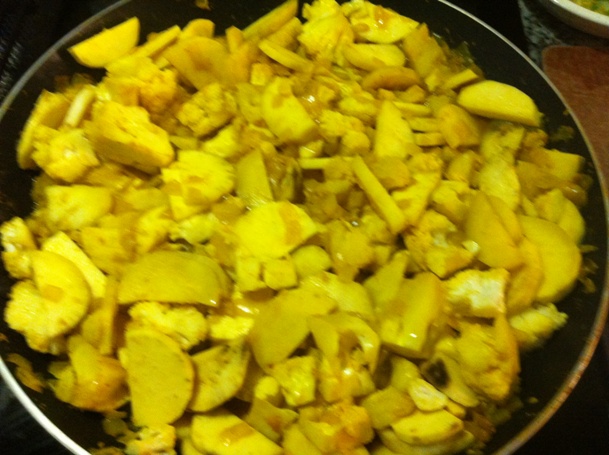
When the timer goes off, remove the lid and stir the vegetables. Since the pan may be full, it might be easiest to lift the vegetables up with a nonstick-safe spatula and turn them over in the pan, rather than trying to stir them in a circular motion. Turn the vegetables until the curry coats everything in the pan (the turmeric in the curry will turn everything yellow, as seen below). Replace the lid and reduce the flame to medium-low or low and let it cook for an additional 10 minutes.

When the timer goes off, stir as before, and if you see any pieces that are looking uncooked, poke them down to the bottom of the pan. Replace the lid and cook an additional 5 or 10 minutes. You can check after 5 minutes, and if the vegetables are done (easily pierced with a fork), continue with the next step. Otherwise, let it cook an additional 5 minutes.

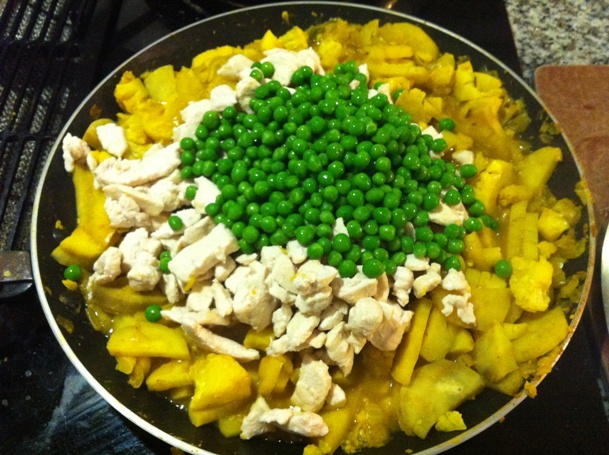
This time, when the timer goes off, it is time to add the cooked chicken and any juices, and the green peas. Stir everything together and let it heat through. If the curry is seeming a little bit watery at this point, you can leave the lid off to let some steam evaporate. Otherwise, replace the lid while the chicken is heating. This step will probably require about 5 minutes.

When the chicken is heated through, remove the pan from the flame. Add the yogurt, if using. I recommend it, since this dish is very low in fat, and the yogurt adds some richness, but it will taste fine without the yogurt. Quickly chop the cilantro, sprinkle over the top of your delicious Paleo Chicken Curry, and stir it in. Dish it up and serve!

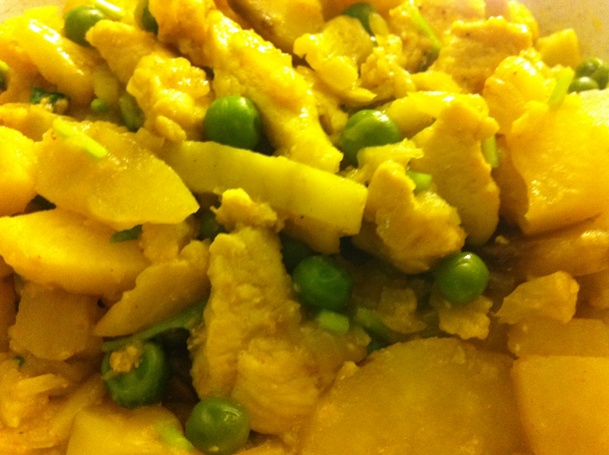
Some notes: The recipe calls for sweet potatoes and cauliflower. If you are omitting the sweet potatoes, you should be aware that cauliflower will absorb much less moisture than the sweet potatoes, so reduce the chicken broth to ½ cup. My favorite sweet potatoes are the white Japanese sweet potatoes, but you can use any kind of sweet potato or yam that you prefer. The Japanese version tends to start discoloring very quickly after being peeled, though, so I usually leave peeling and chopping them until the last minute before I know they are going into the pan (you can see some of the discoloration in my photo above, where the edges of the potato have started to turn dark—and that was only about two minutes after they had been peeled)!Paleo Chicken Curry in a Bowl

With this basic method and a good 12 inch nonstick skillet, you can improvise many different recipes , including cauliflower rice paella and Jambalaya (I’ll be publishing my recipes for both soon). My absolute favorite is the T-Fal Professional Total Nonstick Saute Pan—by far the best nonstick skillet I’ve ever used—and it’s cheap to boot. The only downside is that it doesn’t come with a lid. Luckily, the lid from my 12 inch All Clad pan (not nonstick) fits it perfectly.

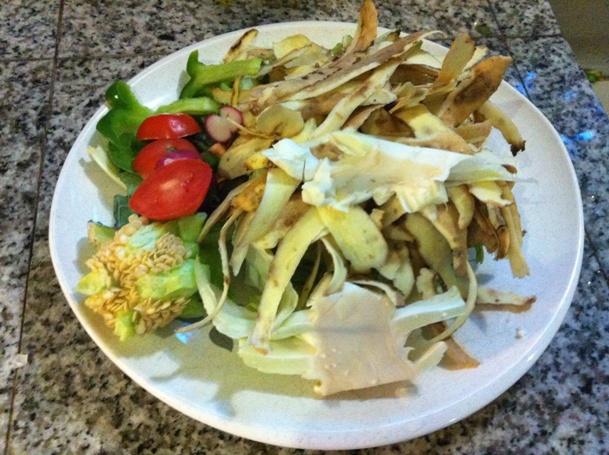
One final note: one of the reasons I love this recipe is because it produces plenty of scraps (potato peel, cauliflower core, cilantro stems) that I can feed to my backyard chickens! Please let me know how you like the recipe!

Scraps for my Backyard Hens

Scraps for my Backyard Hens!


My Go-To Weeknight Primal Beef Stew Recipe

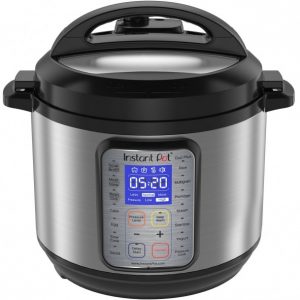
This Primal/Paleo Beef Stew recipe has become one of my favorites, and I make it at least once a week. It requires a pressure cooker, so if you don’t have one, I recommend the Instant Pot Multifunction Pressure Cooker, which is one of the newer electric safety countertop pressure cookers. It is nothing like the old pressure cooker that your grandmother (or great-grandmother!) fretted over because she was afraid it would explode. It has a tight fitting lid with a safety lock so that the lid can’t be removed until the pressure is entirely released, and I use it several times a week. A big bonus is that you can use it all summer long without heating up your entire house, since the heat is retained in the interior rather than being released into the air as steam. It is well worth the price, which was under $100 at the time I was writing this. You can also use a stovetop pressure cooker if you like (Please note that it is possible to cook this stew without using a pressure cooker; details at the end of the article). Total cooking time with a pressure cooker is about an hour (mostly hands-off). Back to the recipe:

Primal Beef Stew

I developed this recipe on my own, and I can honestly say that I’ve never made a bad batch. There are several options for changing it up, so I will lay out my favorite version, and then mention some of the different ways you can customize the recipe. I specify amounts for each of the ingredients listed, but know in advance that most of these things can be adjusted to taste very easily.

Ingredients:

  • Beef stew meat (2 or 3 pounds–grass fed stew beef is the most healthy, if you can afford it)
  • 1 large onion, chopped
  • 6 or 8 cloves of garlic
  • 2 teaspoons table salt
  • 1 teaspoon ground black pepper
  • 1 cup red wine (or chicken broth or beef stock or water or Guinness beer)
  • 1 to 2 pounds of carrots, peeled and chopped into ¾ inch slices/discs
  • 2 or 3 bay leaves (optional)
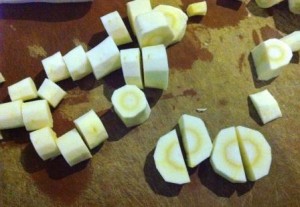
  • 1 pound parsnips, peeled and cut into ¾ inch slices (approximately)Chopped Carrots

And the recipe? Add the first seven ingredients to the pressure cooker and stir. The size of the carrots is not too important, and I actually prefer a mix of sizes. The pressure cooker will cook them well, but larger chunks will retain a bit of firmness, while smaller pieces may be quite soft at the end. Using beef stock or water or chicken broth as the liquid will give your stew a more traditional flavor, while red wine will give it a sort of beef burgundy richness. I have lately been using Guinness beer, and I think it makes a great alternative.  After stirring, tuck the bay leaves down into the meat (if using). Put the lid on and start the pressure cooker on high. Set the timer for 40 minutes. If you are using a stovetop pressure cooker, start timing after it reaches pressure.

Once the first 40 minutes is up, carefully release the pressure (being careful not to burn yourself with hot steam—I use a wooden spoon handle to do this). When the steam is released and the safety latch opens, take the lid off and add the parsnips. Stir until mixed, breaking up any beef chunks that have stuck together. Place the lid on and cook on high for 9 or 10 more minutes. At the end of the cooking time, you can either let the pressure reduce on its own, or you can release the steam if you want to serve it quickly. Taste the stew and adjust the salt and pepper or other seasonings if necessary.
That’s it! You’ve just made some delicious and totally paleo/primal friendly beef stew with about 10 minutes of actual work (chopping and stirring), and less than an hour of cooking time.

Now for the ways you can customize:

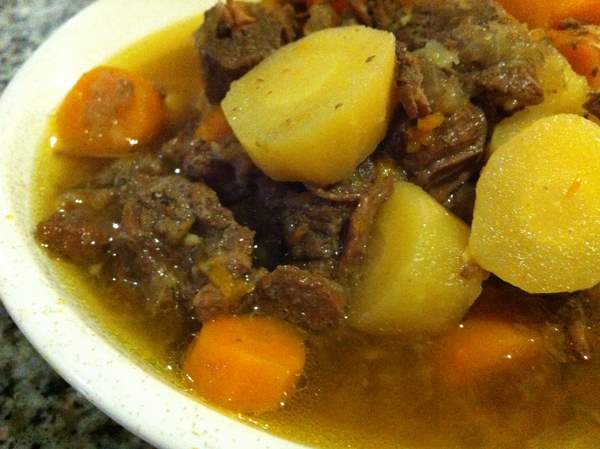
Parsnip Beef Stew

If your parsnips are thick, cut the discs in half.

I prefer a thick stew without too much liquid (you MUST use some liquid in a pressure cooker, or the food will burn, by the way), so if you prefer a more soupy or brothy stew, add another cup or so of liquid (but be aware that whatever liquid you add will not escape as steam, since it is sealed tightly, and the meat and vegetables will release some liquid as they cook, so the finished stew will look more liquid-y than what you see in the pot at the beginning).

I specify parsnips because I love them, and think they give a great flavor to the stew. If you’ve never had them, they’re kind of like a super-carrot, or a very strongly flavored carrot that is a bit perfume-y. They look like a carrot, but they’re white instead of orange. If you don’t like parsnips , or if you can’t find them (it’s harder to find them during the summer—here in Austin, Whole Foods doesn’t have them year-round, but Central Market does), you can substitute either rutabagas or turnips with excellent results; just cut them into ½ to ¾ inch dice and add them during the last 10 minutes in place of the parsnips. The reason for the divided cooking time is because the vegetables that go in at the end are softer, and if you cooked them for 40 minutes in a pressure cooker, they would completely fall apart into mush, whereas the carrots are much more firm, so they can take a longer cooking without dissolving. Turnips and rutabagas are a bit firmer than parsnips, but they should still be entirely cooked in the allotted 10 minutes. You could also add cauliflower (I have done it before when I didn’t have anything else on hand), but cauliflower is quite delicate, and if you cook it for longer than 5 minutes in a pressure cooker, it will dissolve, so just shorten the cooking time. The meat will be entirely cooked during the first 40 minutes, so the last 5 or 10 minutes is not even necessary. If you want just a beef and carrot stew, simply stop the cooking at 40 minutes and you’re done!

One last tip: the parsnips tend to start becoming discolored after they are peeled and chopped, so I usually wait until the first 40 minutes is up and then peel and chop them quickly.  Parsnips are also quite variable in size, unlike most carrots.  A parsnip might be an inch and a half thick at the top, only to taper quickly to a quarter-inch point.  With thick parsnips, rather than cutting them into discs, I cut the thicker part off and cut it in half before cutting it into half moonshapes, and then cut the thinner part into discs.

Primal Beef Stew

Primal Beef Stew

Without a pressure cooker: if I were going to spend all day cooking beef stew, I would not follow this recipe.  I would first brown the meat in small batches on all sides to develop some flavor and fond in the pot, and then I would simmer the ingredients for two hours or longer, long enough to give the collagen and connective tissue a chance to dissolve (stew meat is usually a mix of different cuts, and it usually includes a fair amount of connective tissue).  The recipe above takes several shortcuts in order to make it an easy meal to make on weeknights.  If you have all day, you can follow the steps above, but brown the meat in batches, then add your wine or broth and scrape the browned bits off the bottom of the pan (this will add flavor to the broth), add the ingredients as described in the first cooking period above (onions, garlic, beef, carrots, liquid (wine or broth or water), bay leaves, salt, pepper) and place the lid on the pot.  Then place it in an oven that is set at 325 degrees F for two hours or longer.  Add the parsnips or other ingredients and put it back in the over for another 30 minutes.